Assay Exchange
This guide covers how to create Assay Exchange. By utilizing this feature, sellers and buyers of metal concentrates can streamline the assay exchange process, reduce operational risks, and shorten settlement timelines.
Assay Exchange Process
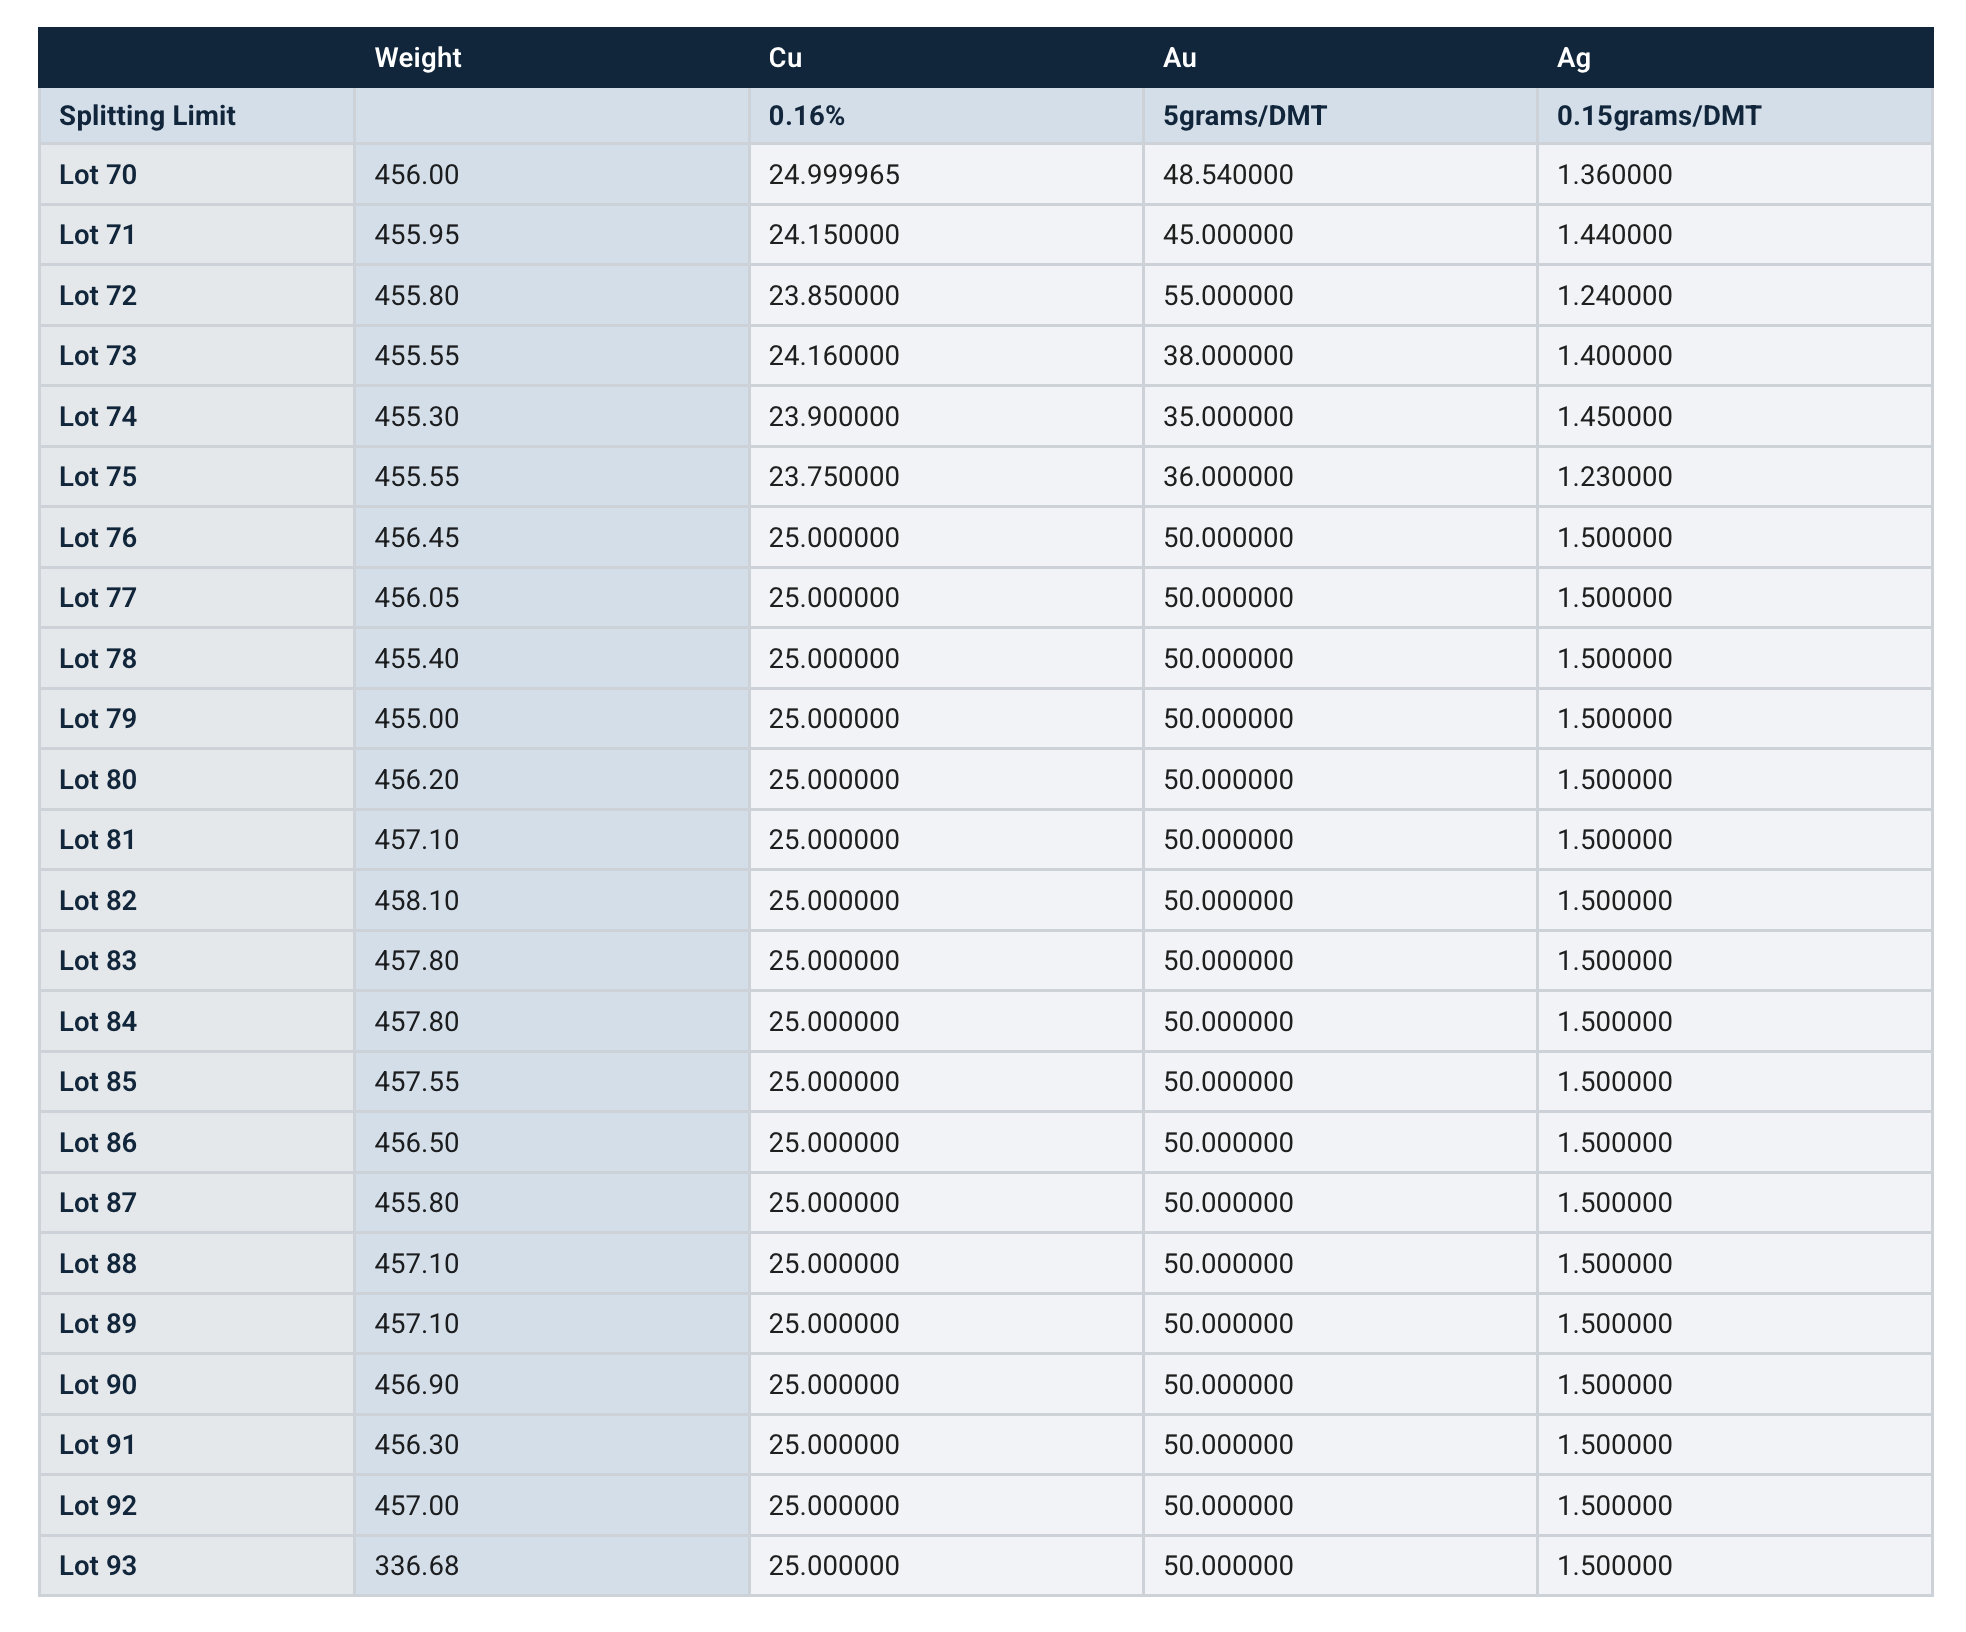
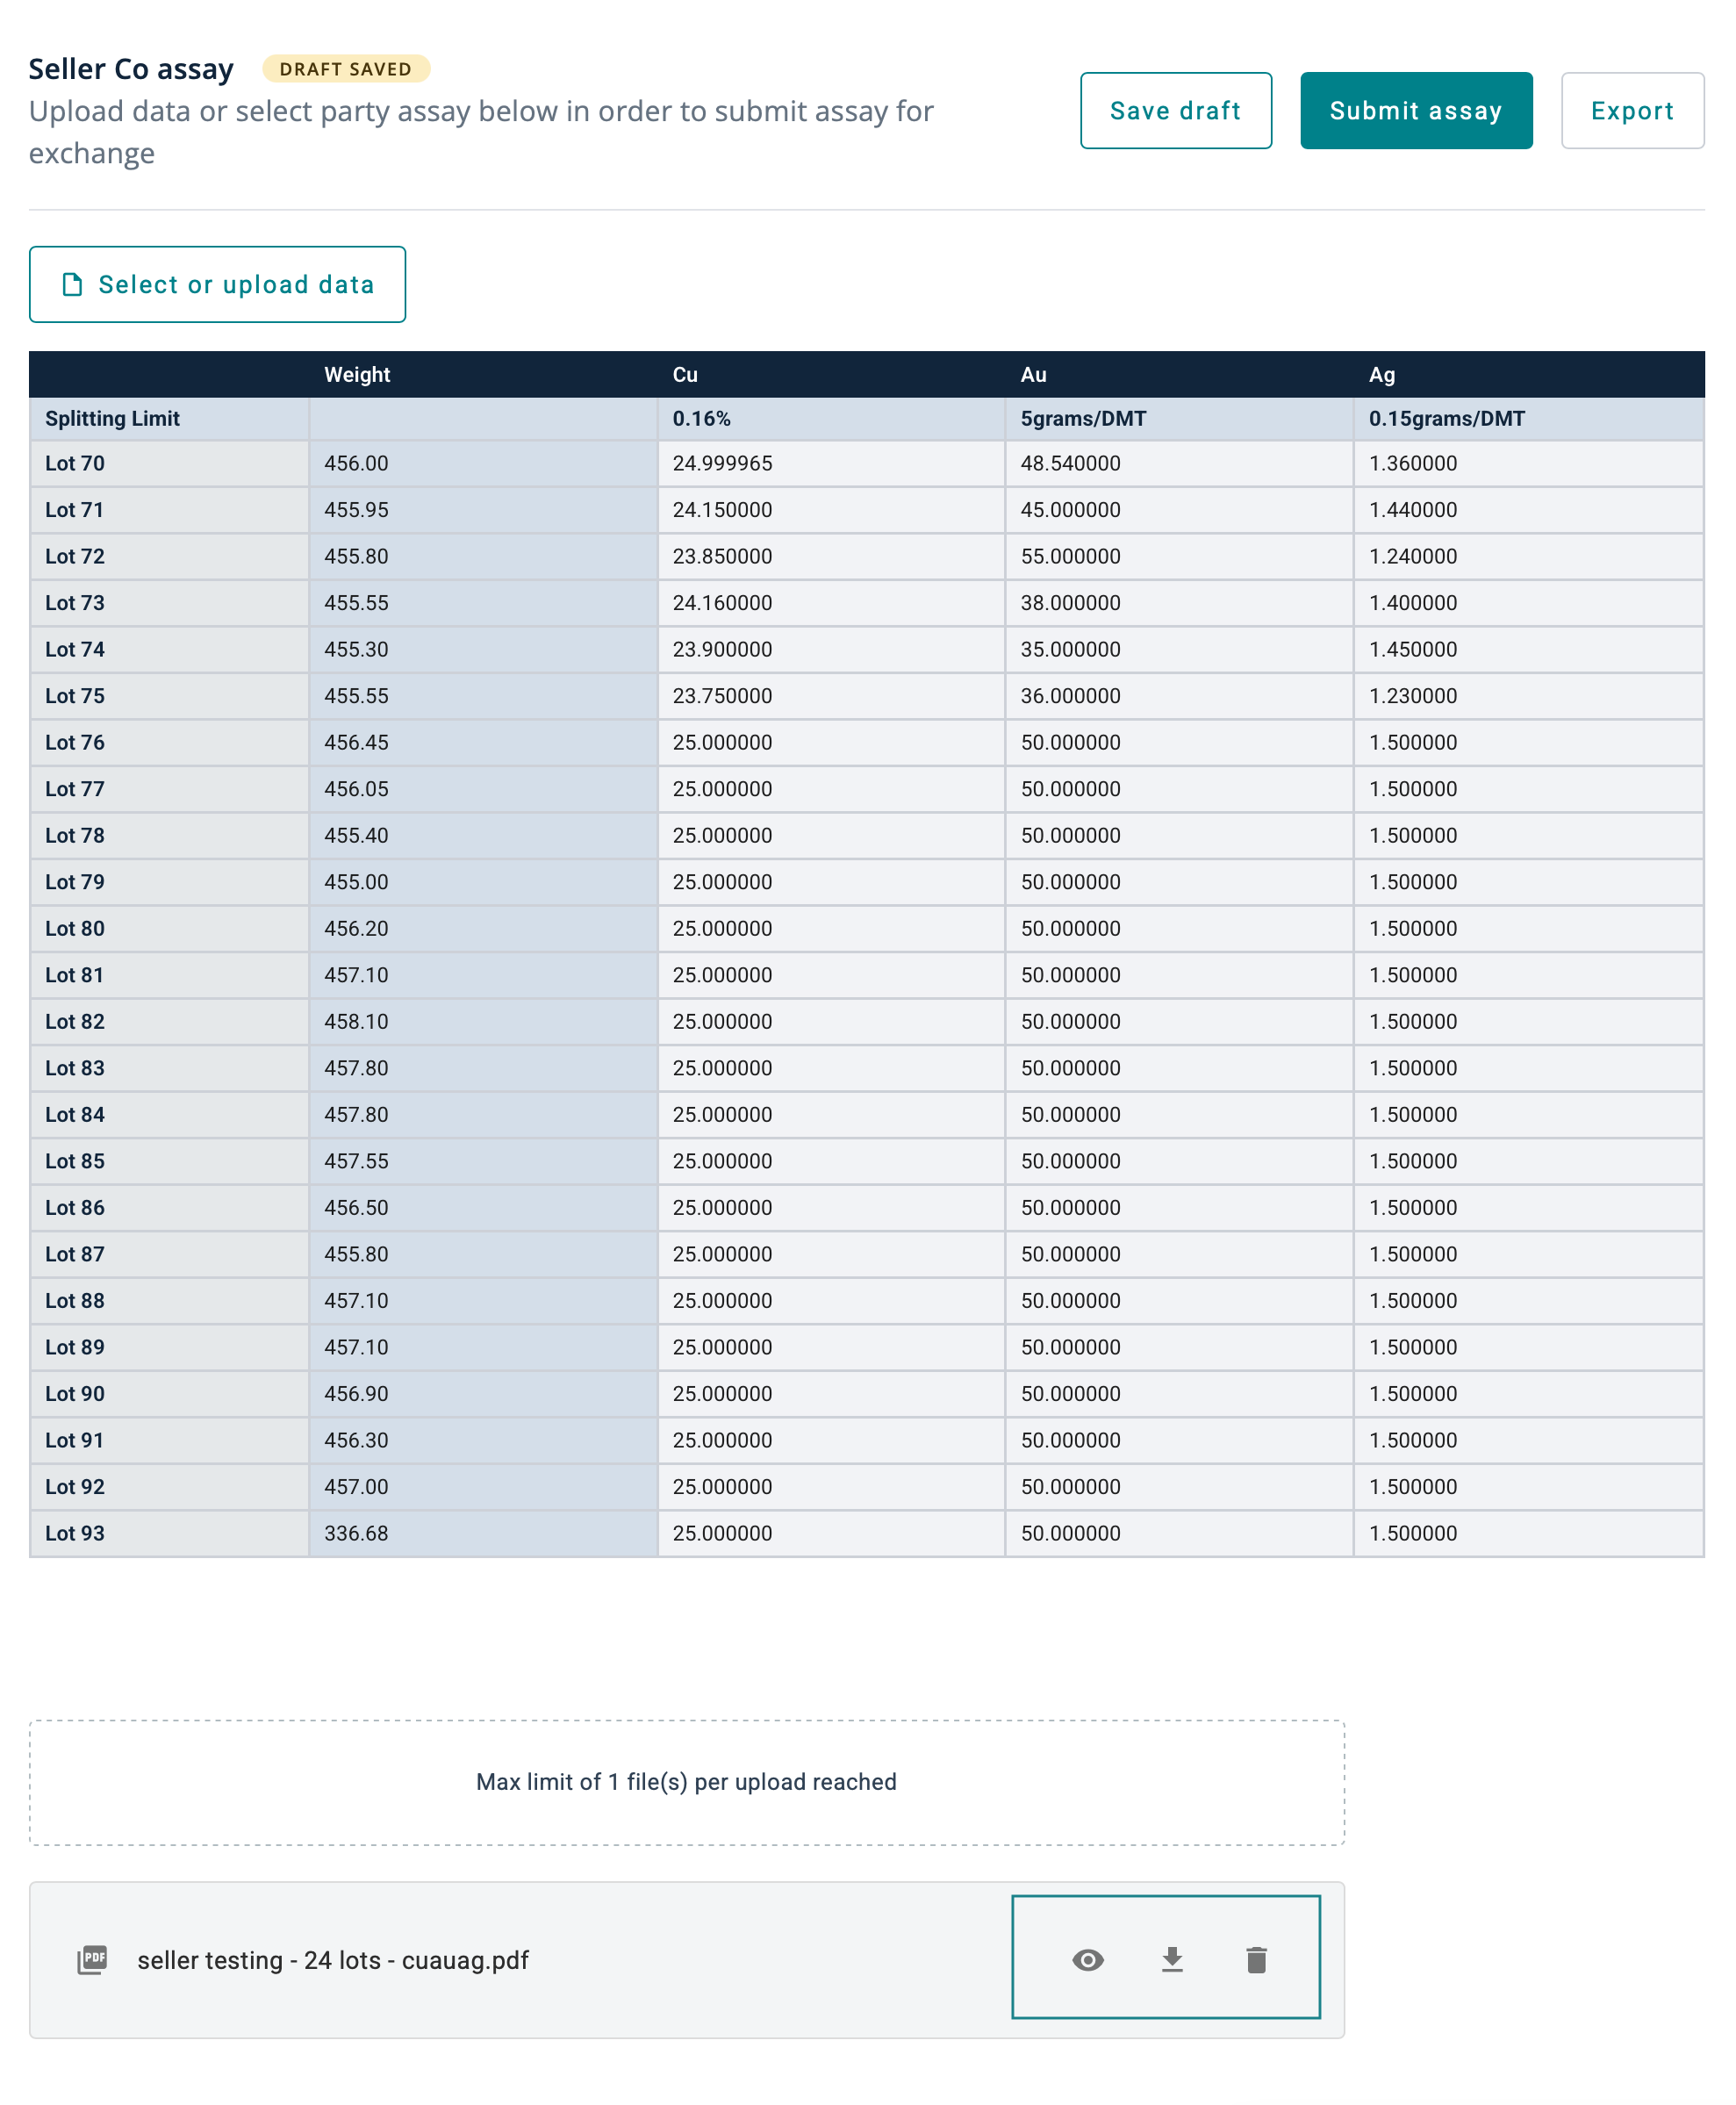
Once the counterparty confirms the Assay Exchange Pre-Agreement, an Assay Exchange Table will be automatically generated based on the contract and shipment details.
Assay Exchange Table
Users can submit assay data using one of the following methods:
1. Manual Entry
- Copy and paste Lot names, Weight, and Assay values into the system.
2.Select of upload data
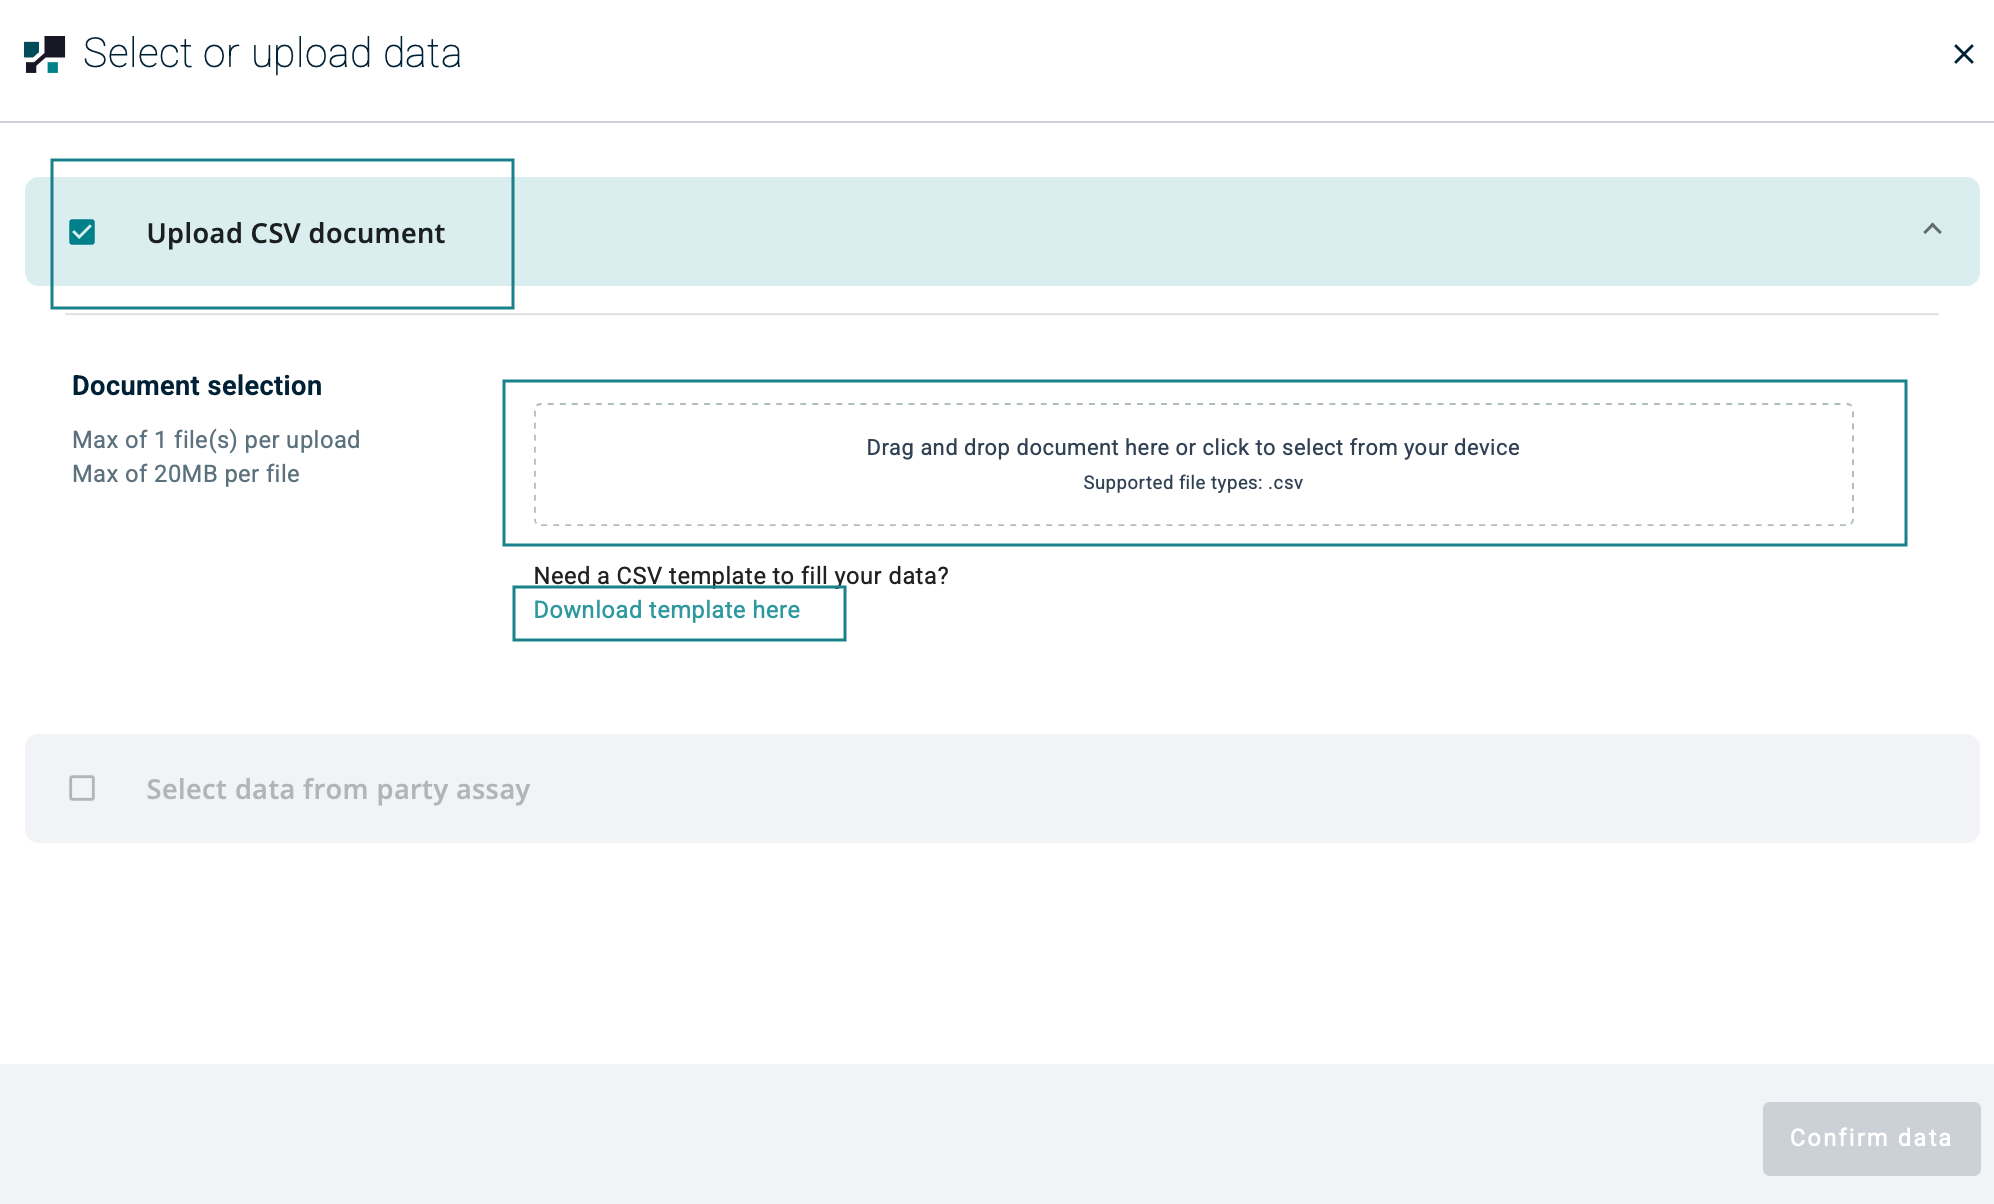
2.1 Upload CSV document
Document selection
- Drag and drop the relevant CSV file into the upload box.
If needed, click Download template to obtain a CSV template for data entry.
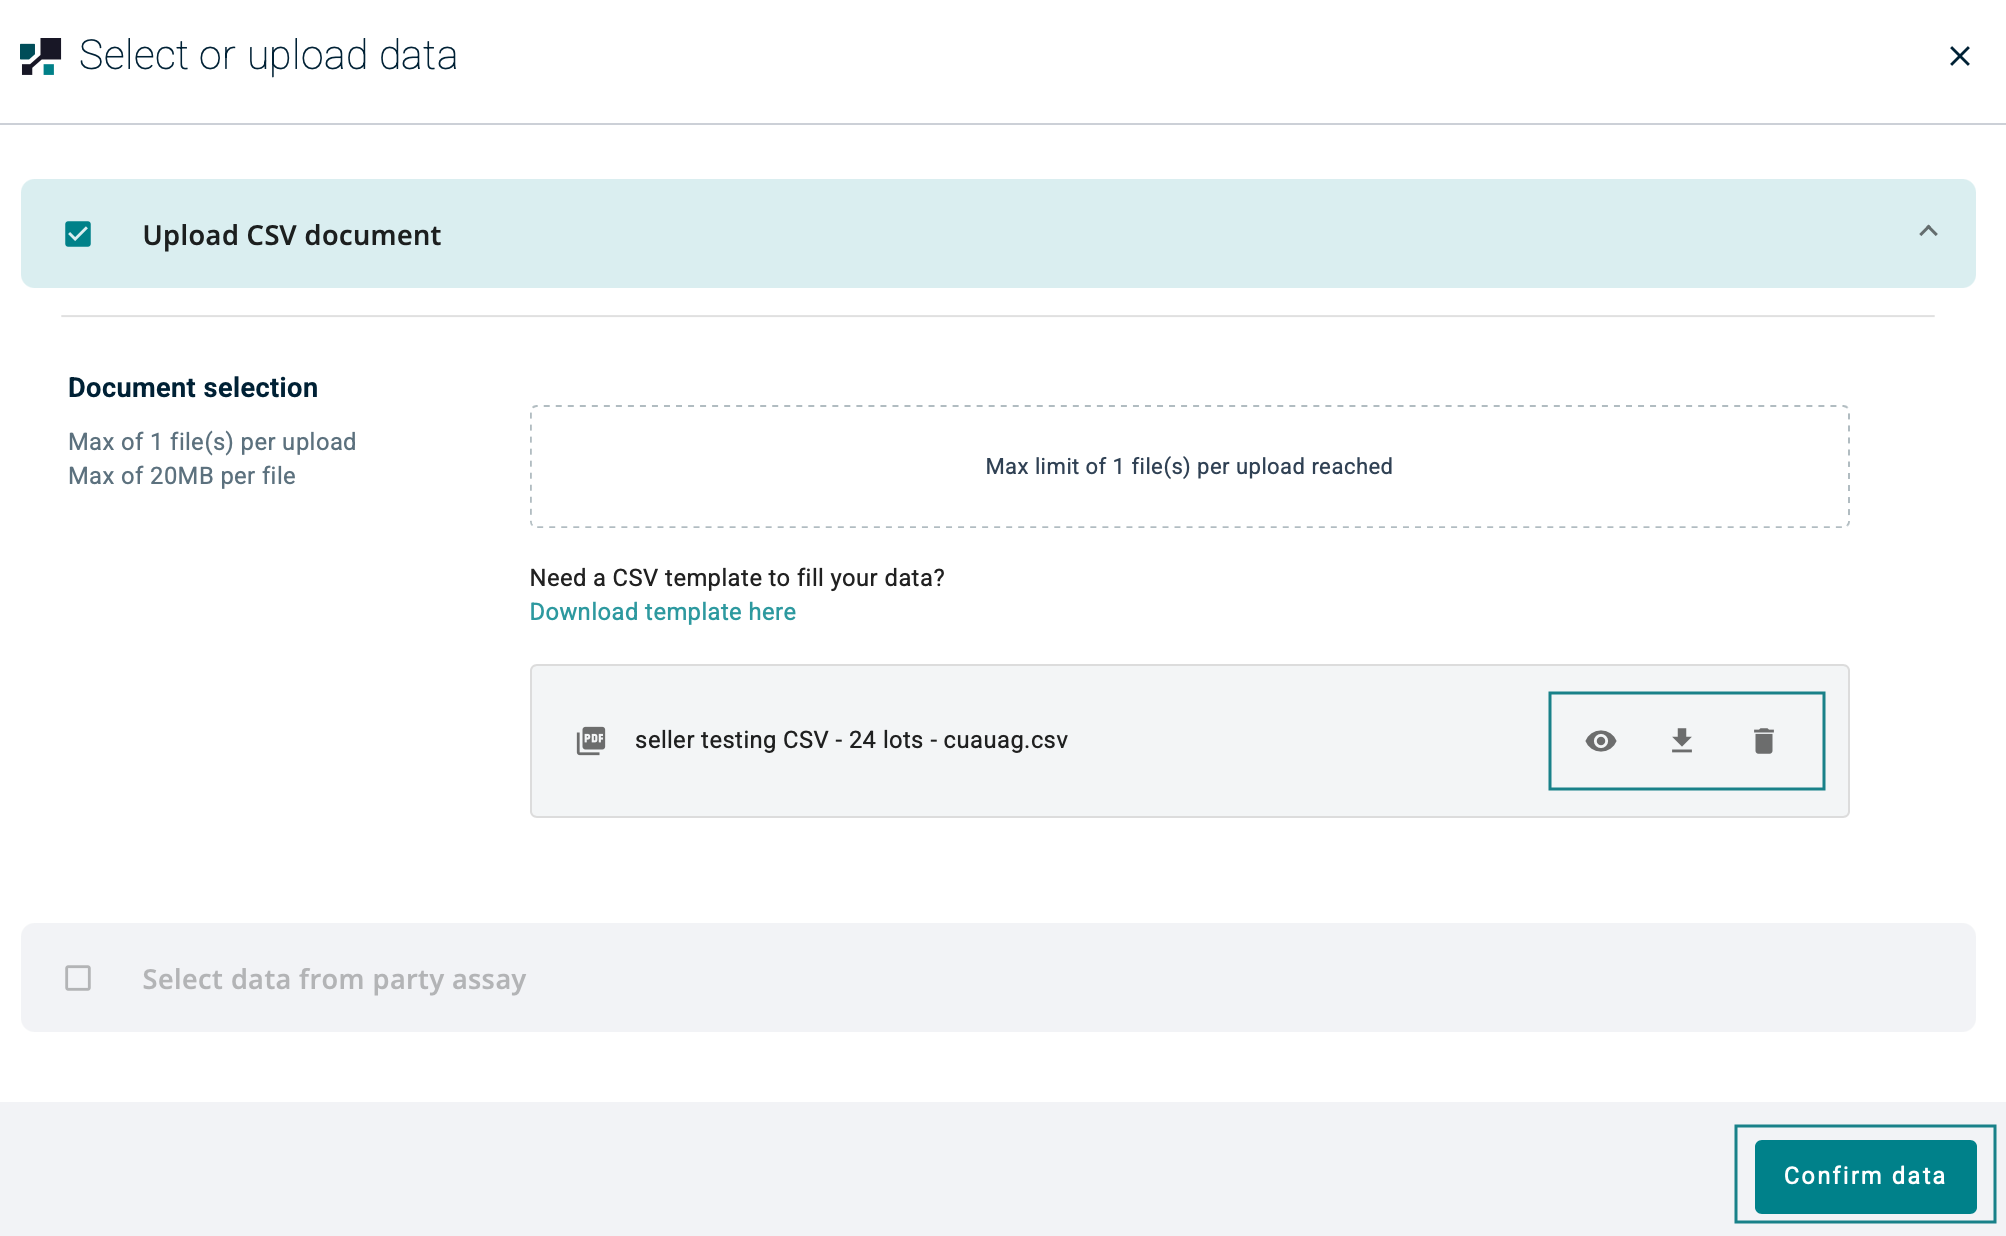
- After uploaded (Max limit of 1 file), user can
- Preview Download (eye icon)
- Download CSV
- Delete document (bin icon)
- Hit Confirm data to complete the upload
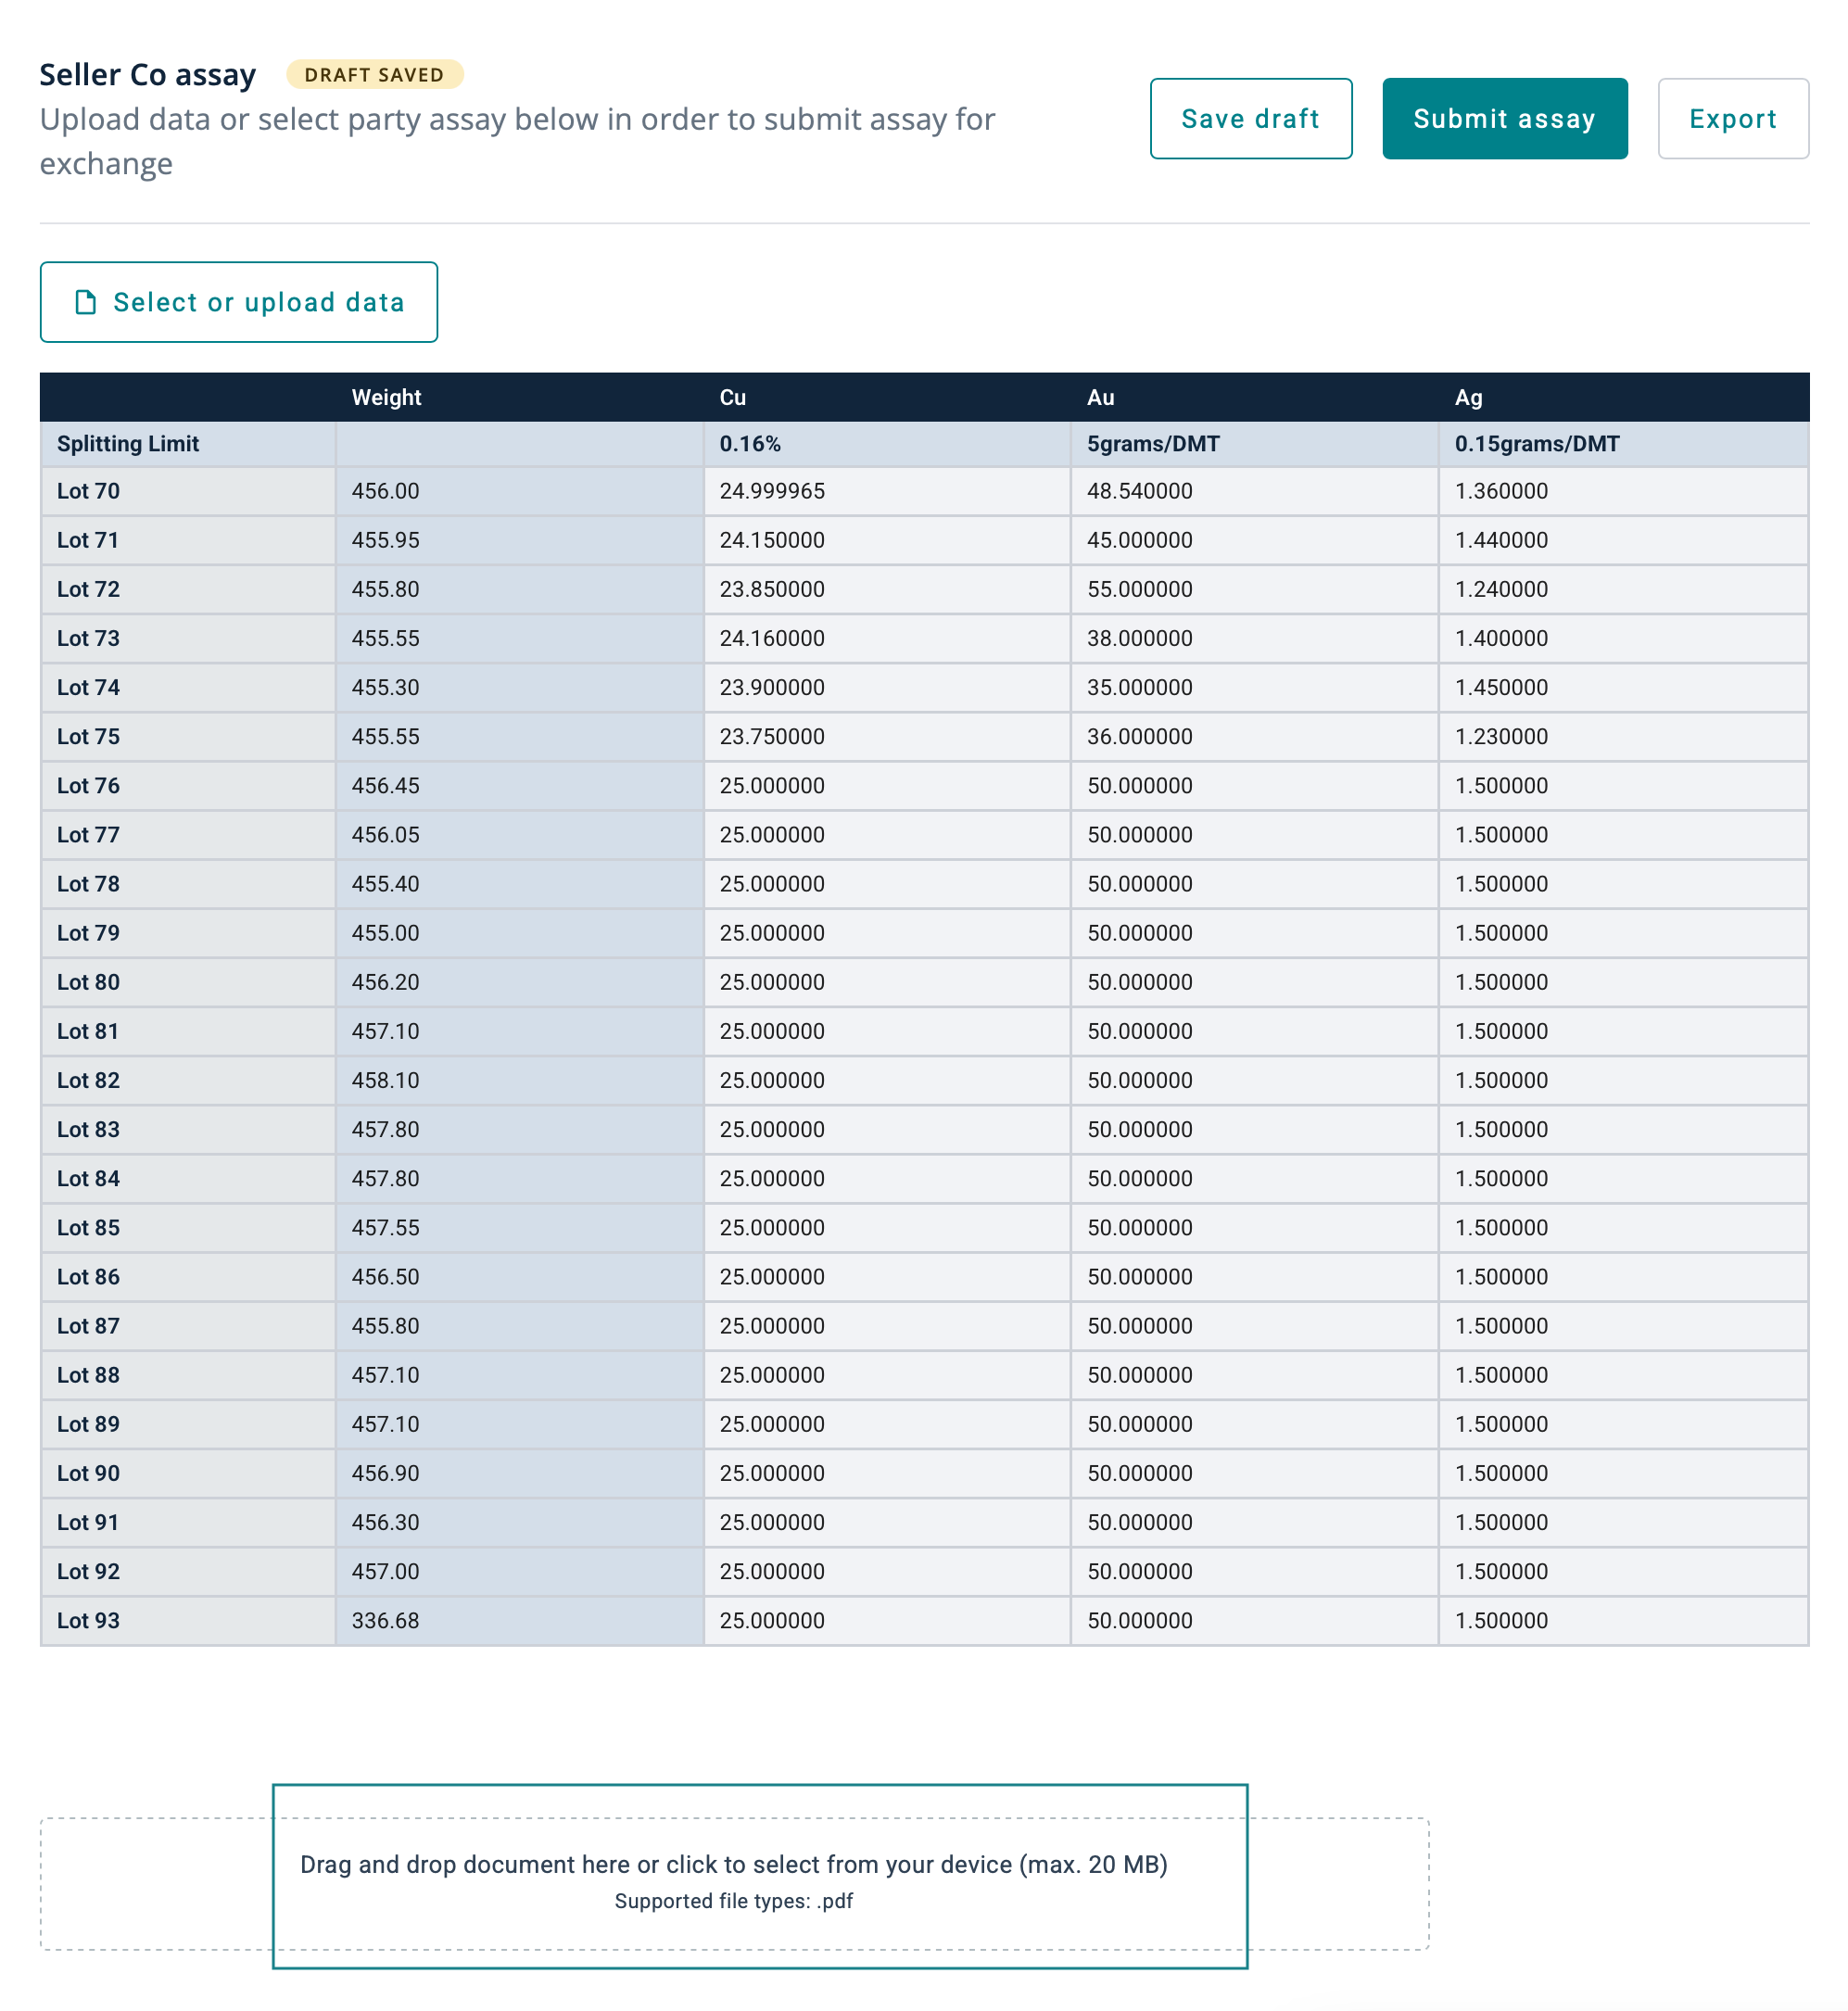
Assay Table is now uploaded
- Drag and drop the relevant PDF file into the upload box
After uploaded (Max limit of 1 file), user can
- Preview Download (eye icon)
- Download CSV
- Delete document (bin icon)
- Hit Confirm data to complete the upload
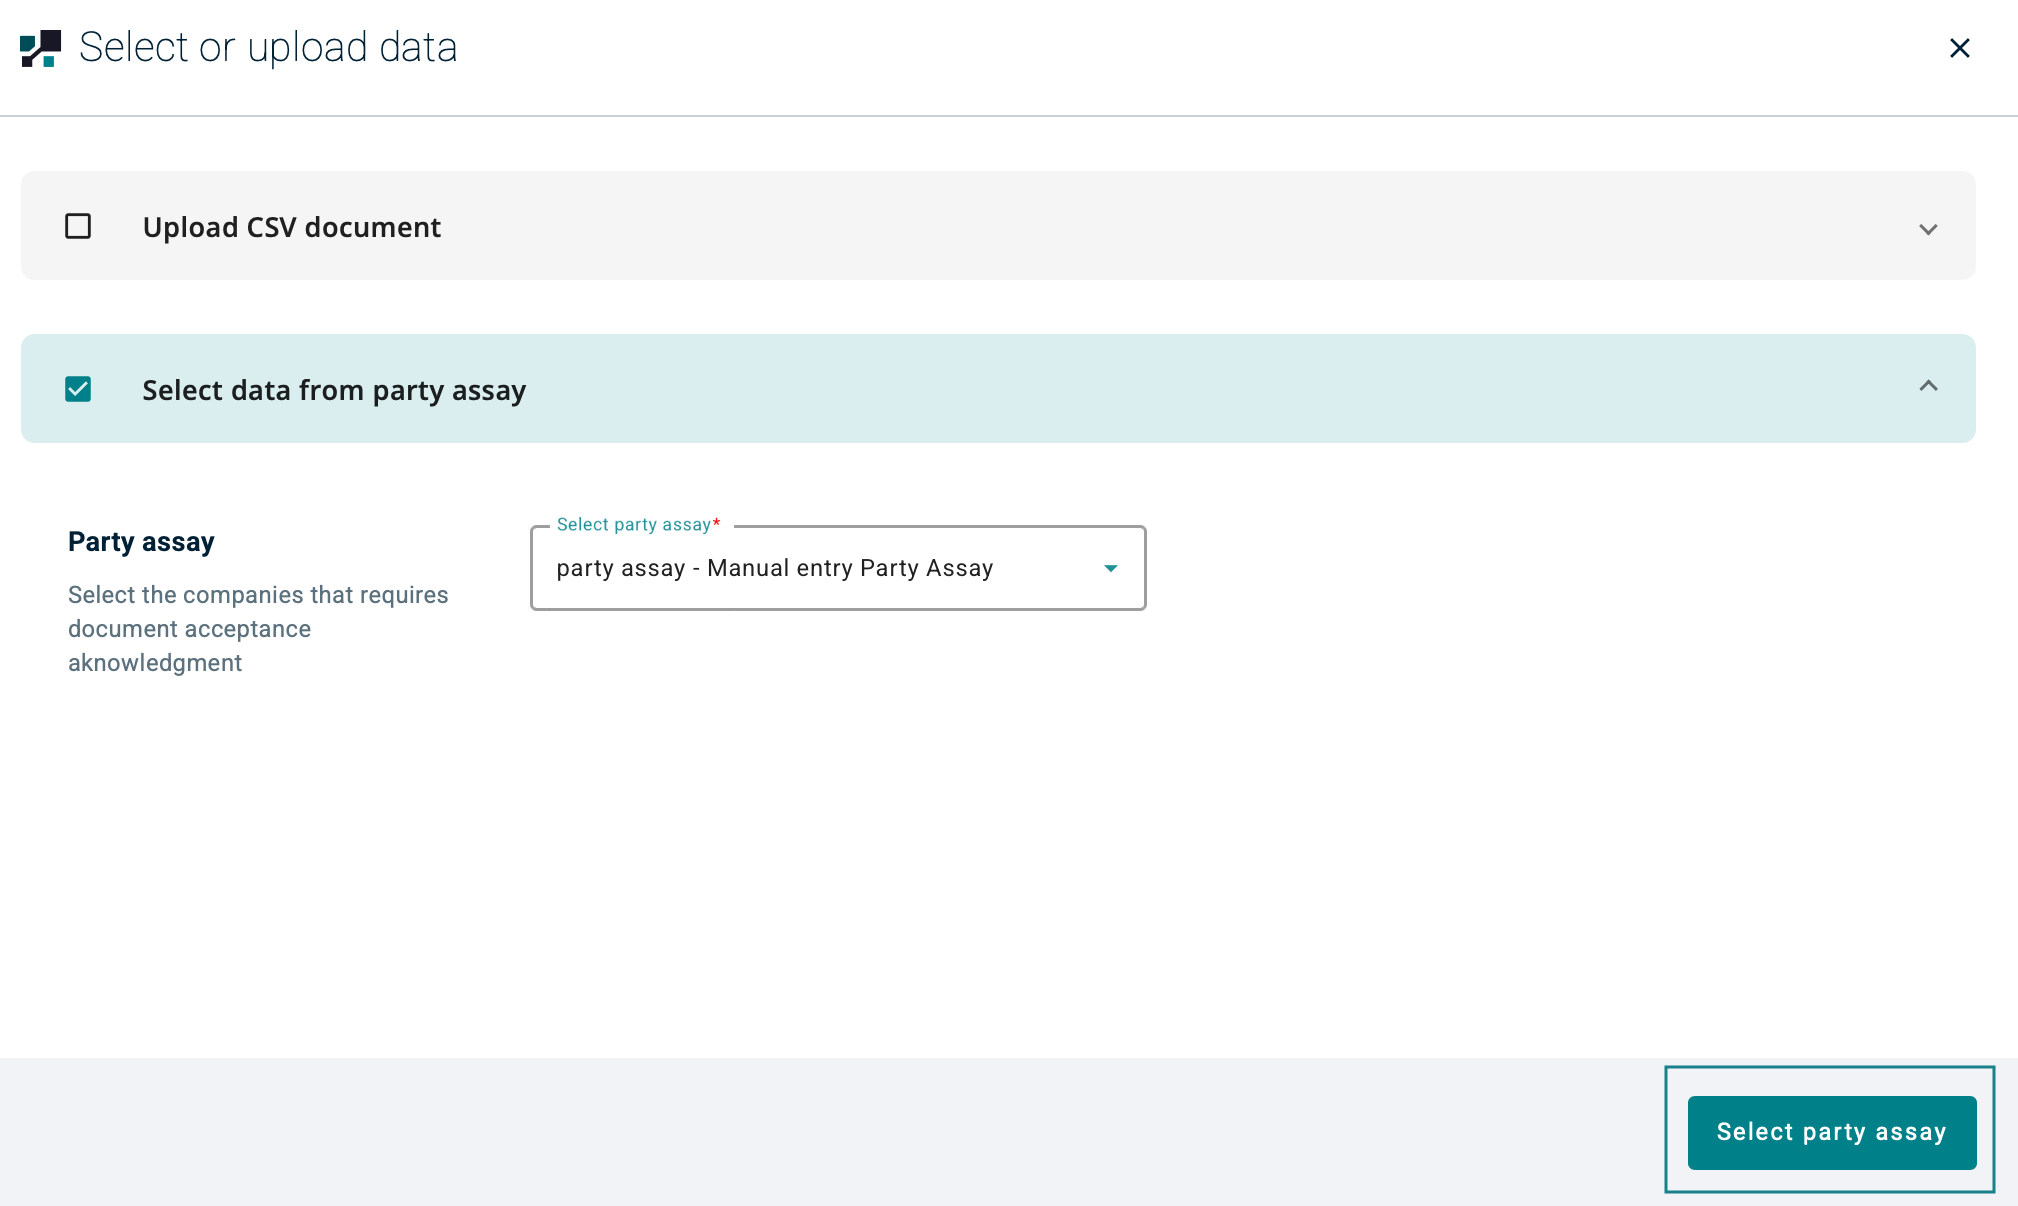
2.2 Select data from party assay
Party assay
Select the companies that requires document acceptance acknowledgment from the party assay drop down list.
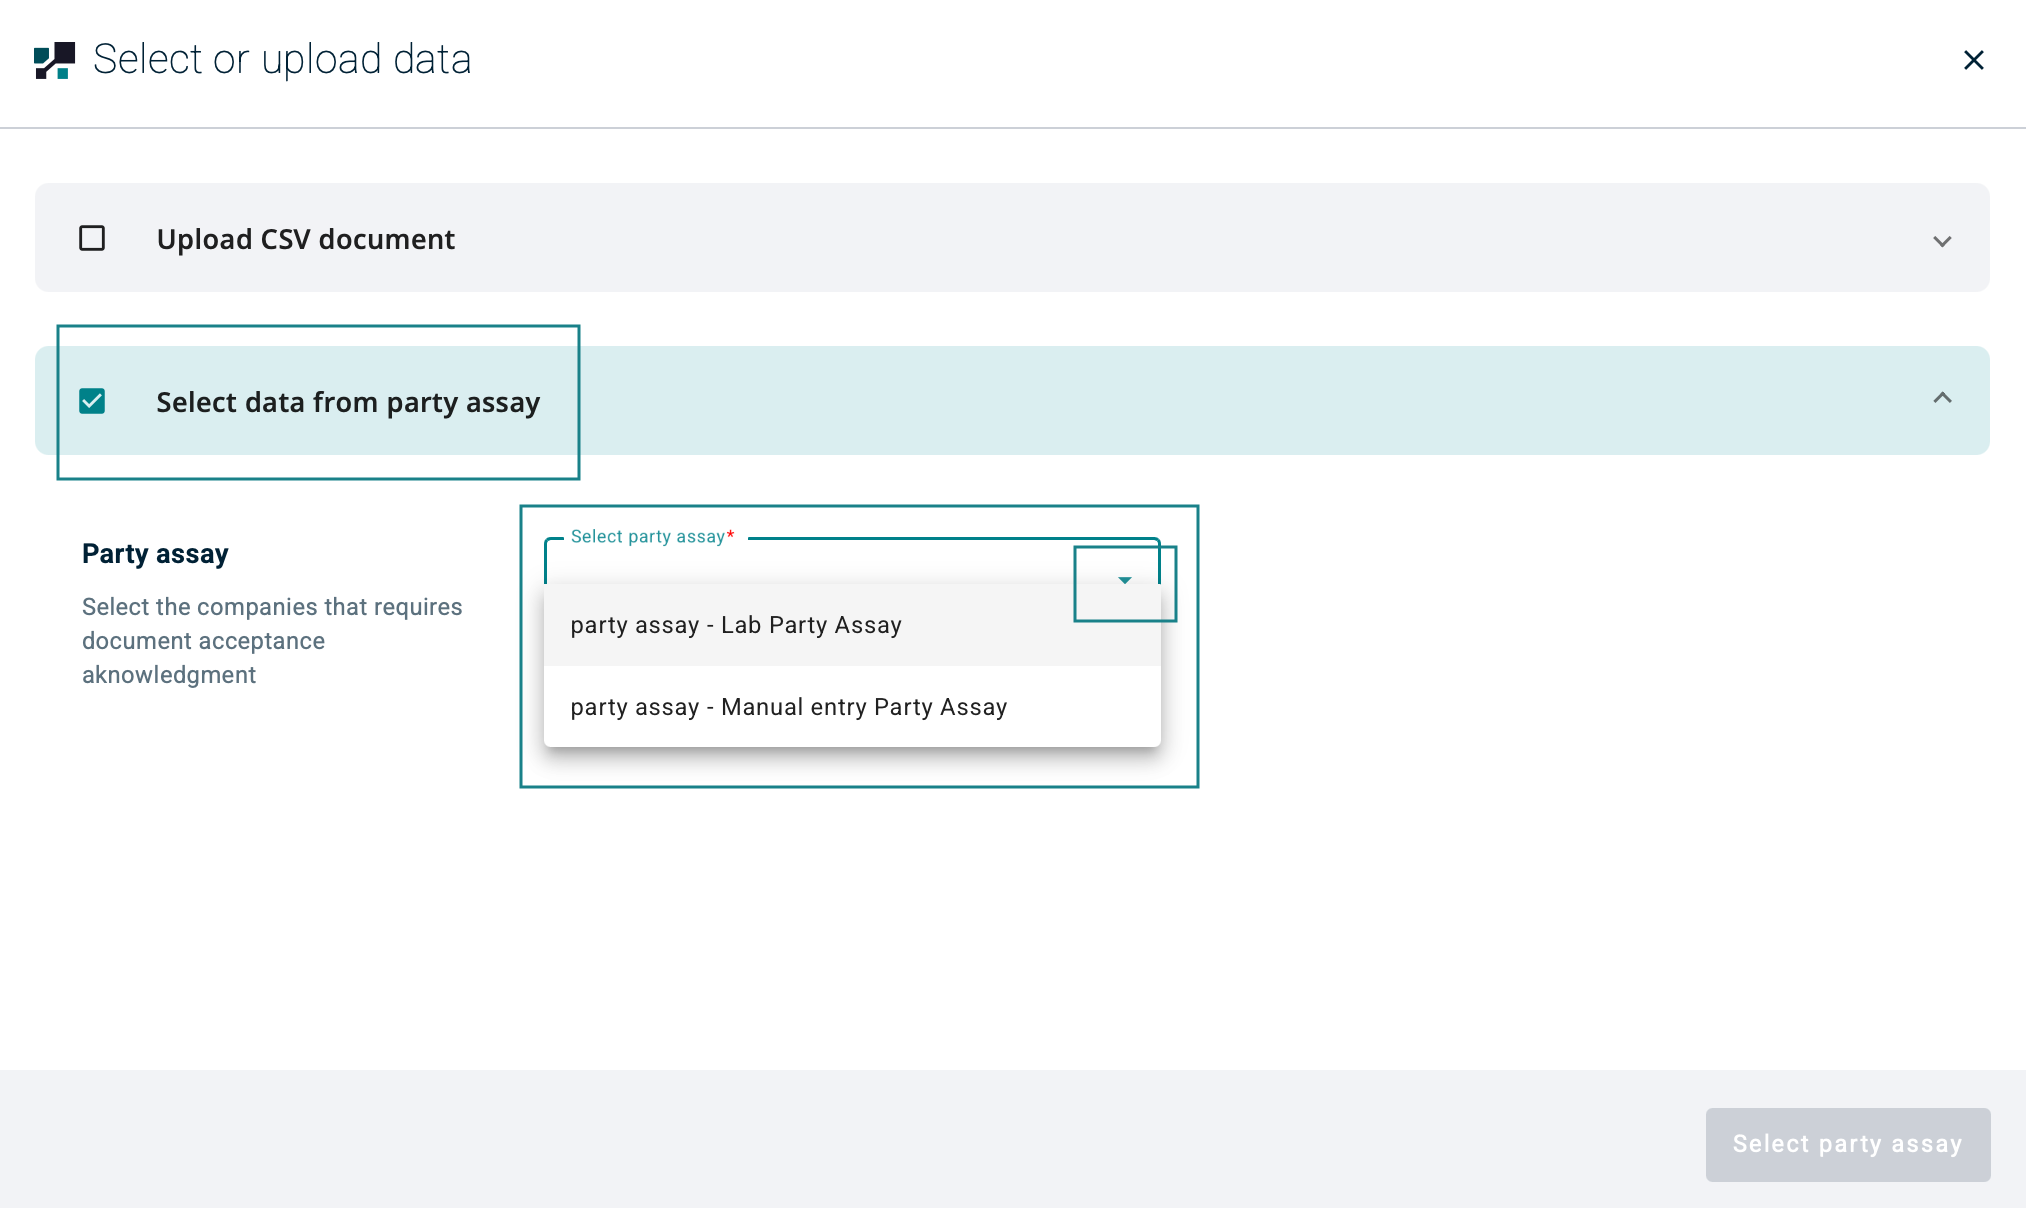
Hit Select party assay to upload
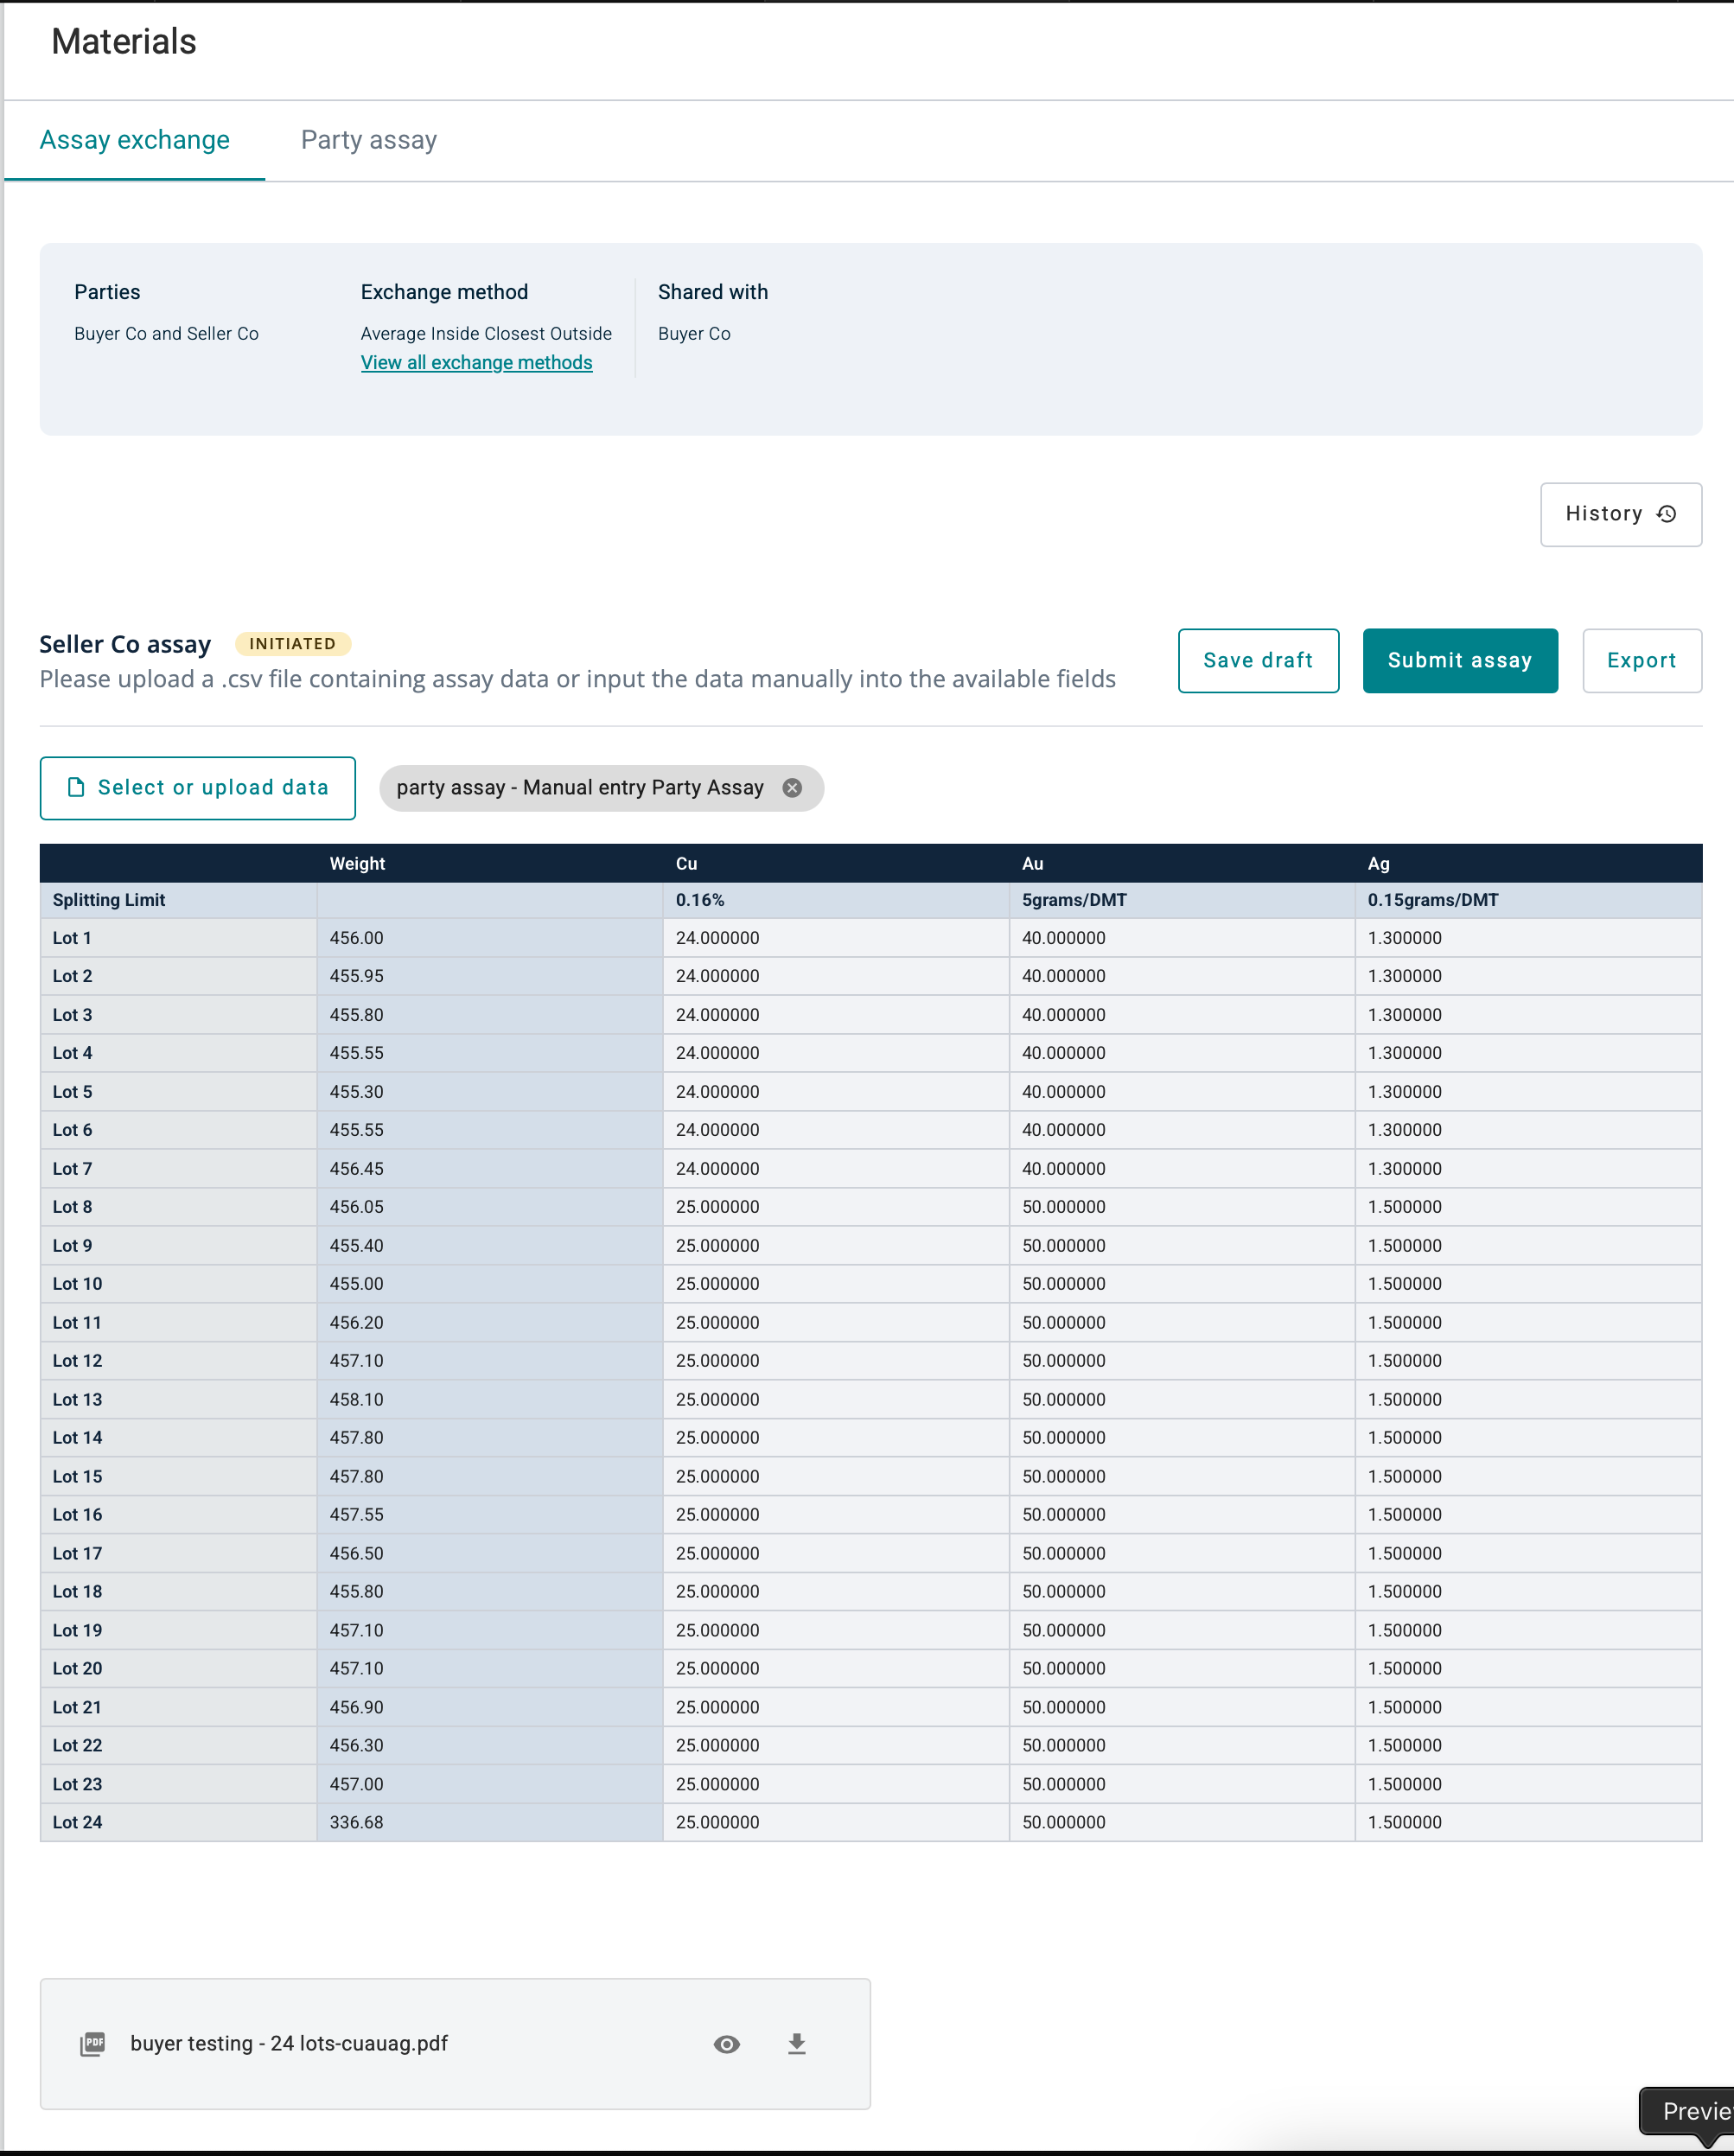
Assay Table is now uploaded with the Party Assay details
Party Assay must be created before it can be sellected from the dropdown list.
For more details on Party Assay creation, check out - Party Assay user guide.
Assay Exchange Table can now be
- Save draft (nothing will be sent out yet and Assay Table can still be edited)
or
- Submit assay to the country party to auto calculate Assay Difference (this cannot be undone and)
- The only changes that can be made is Edit lot names
- The counterparty assay table will appear once both parties have submitted their assays
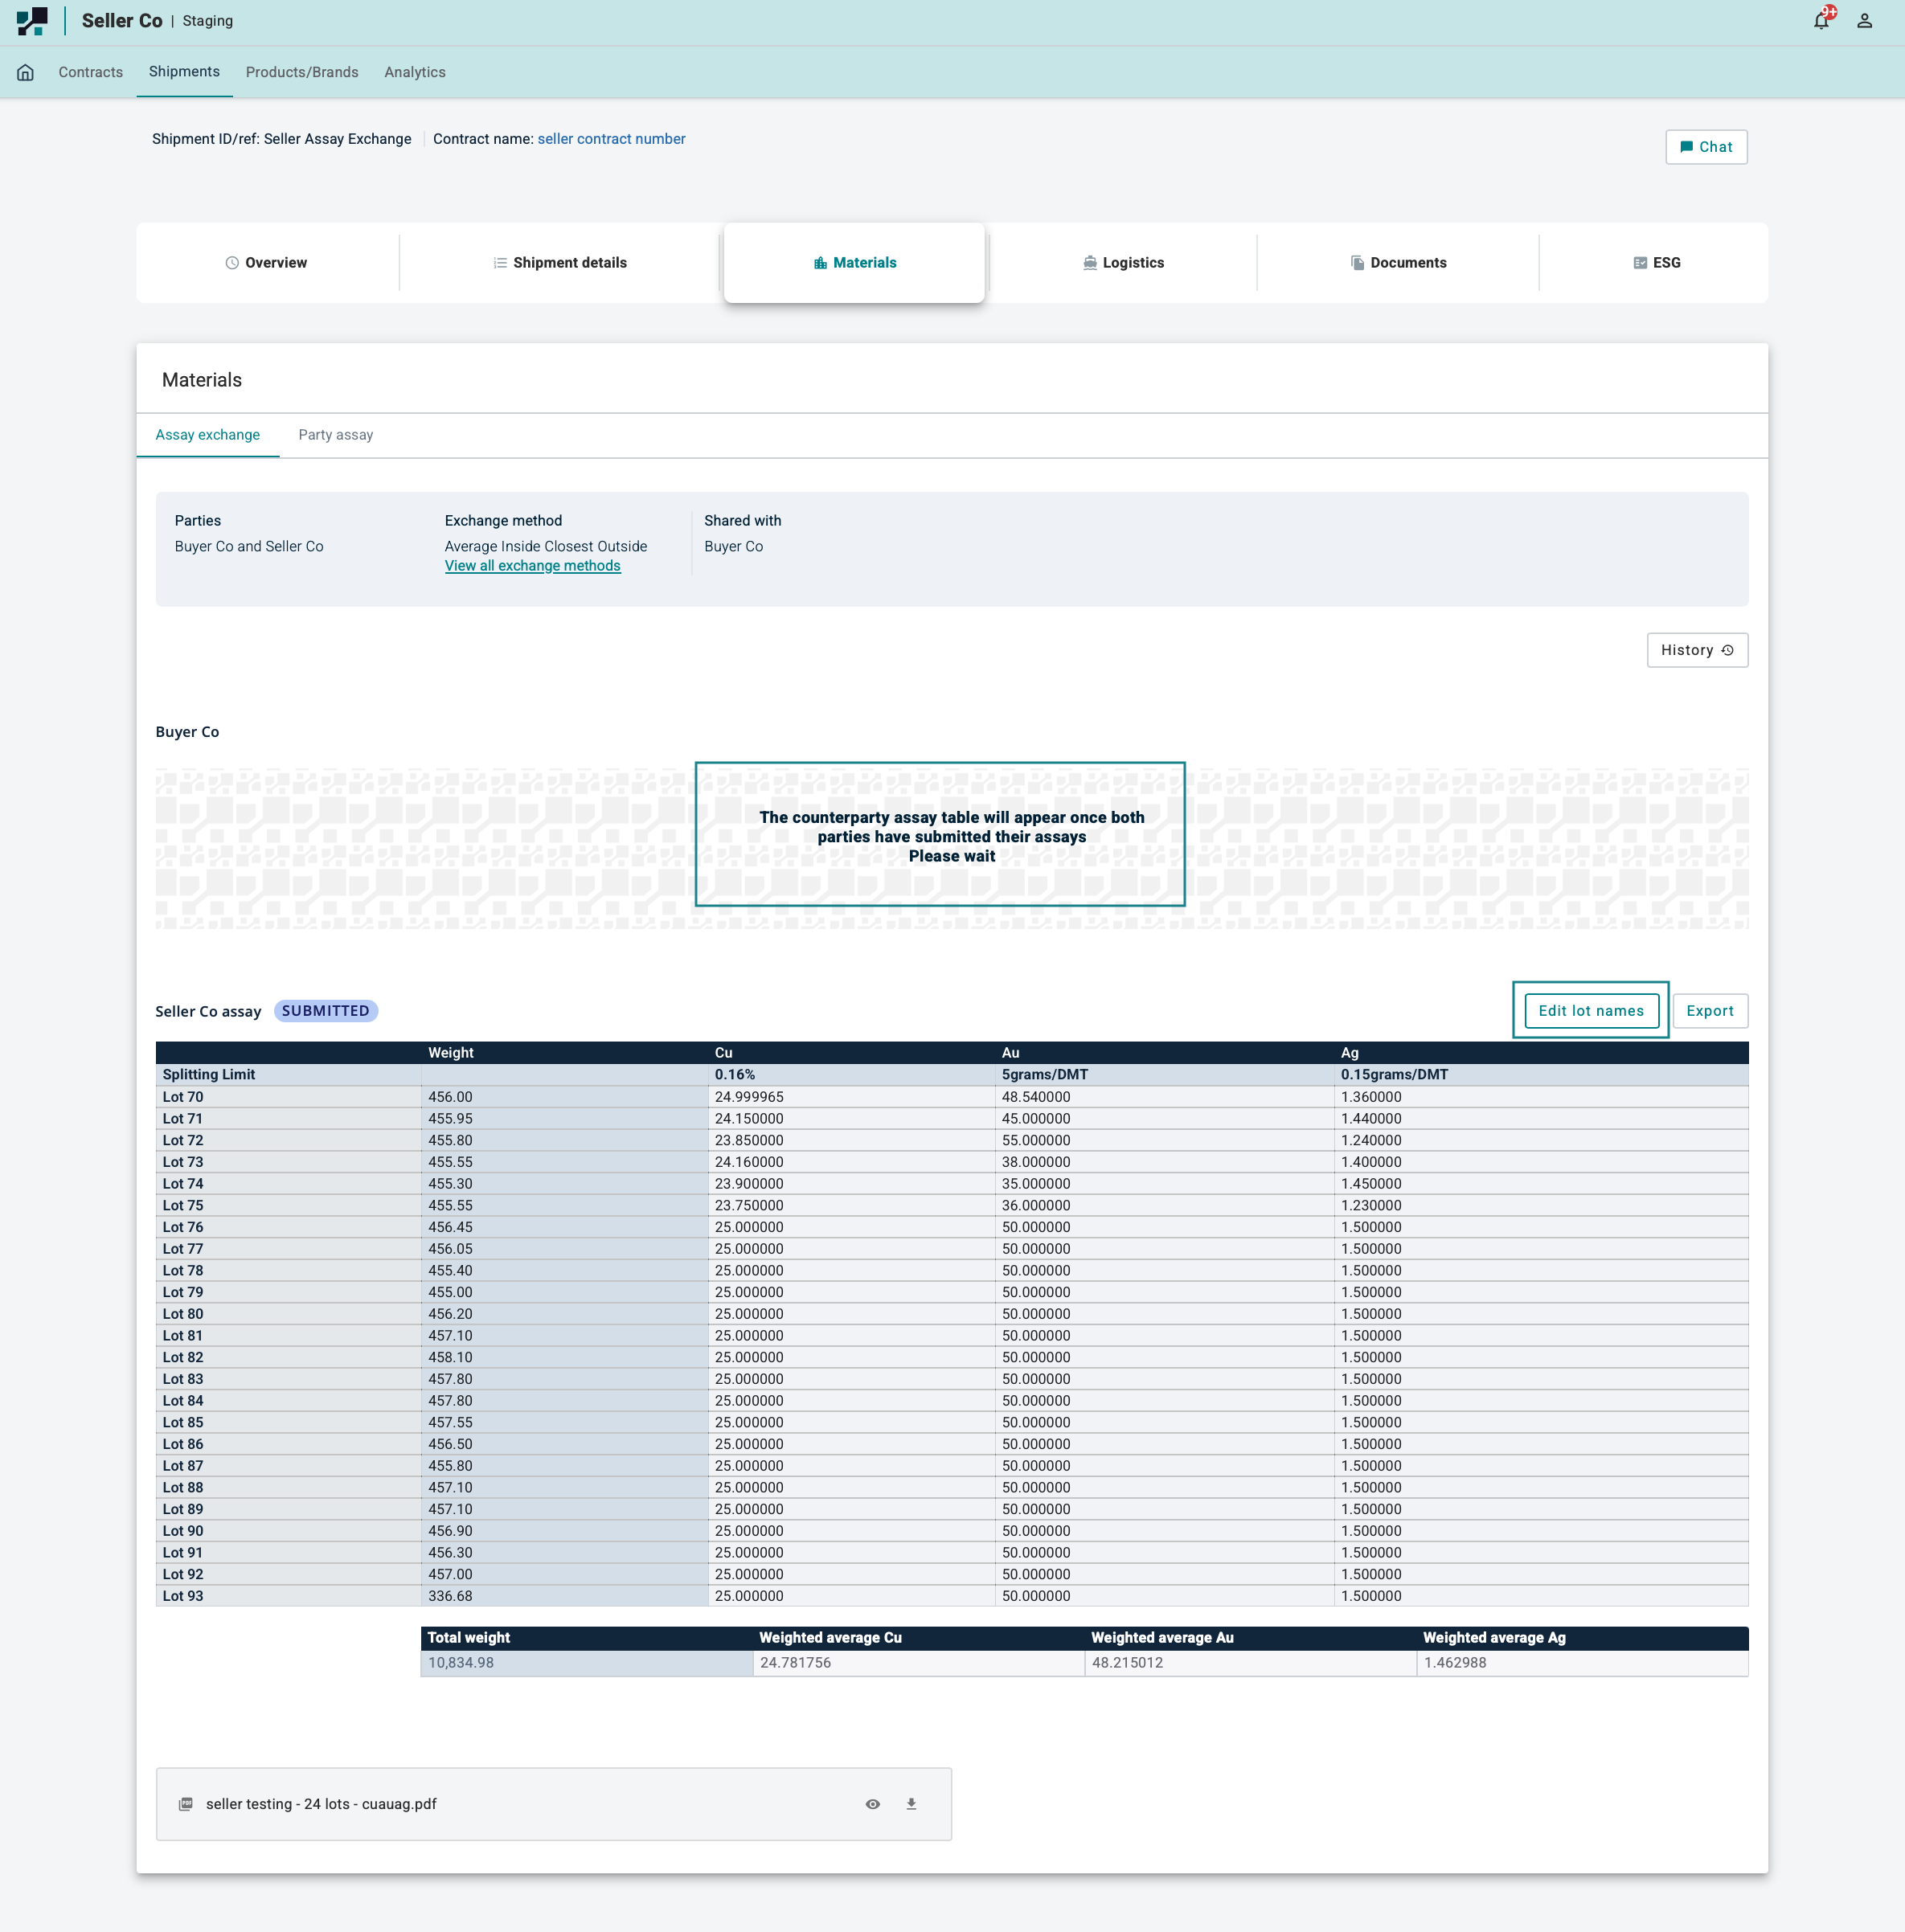
Exporting the Assay Table is possible by click on the Export button