Assay Exchange Pre-agreement
This guide covers how to create Assay Exchange Pre-agreement. Sellers and buyers can manage, confirm and track changes to contract details, including splitting limits, payables, deductibles, umpires, and more
Shipment must be CONFIRMED to initiate the Assay Exchange.
For more details on Shipment Creation, check out - Creating Shipment user guide.
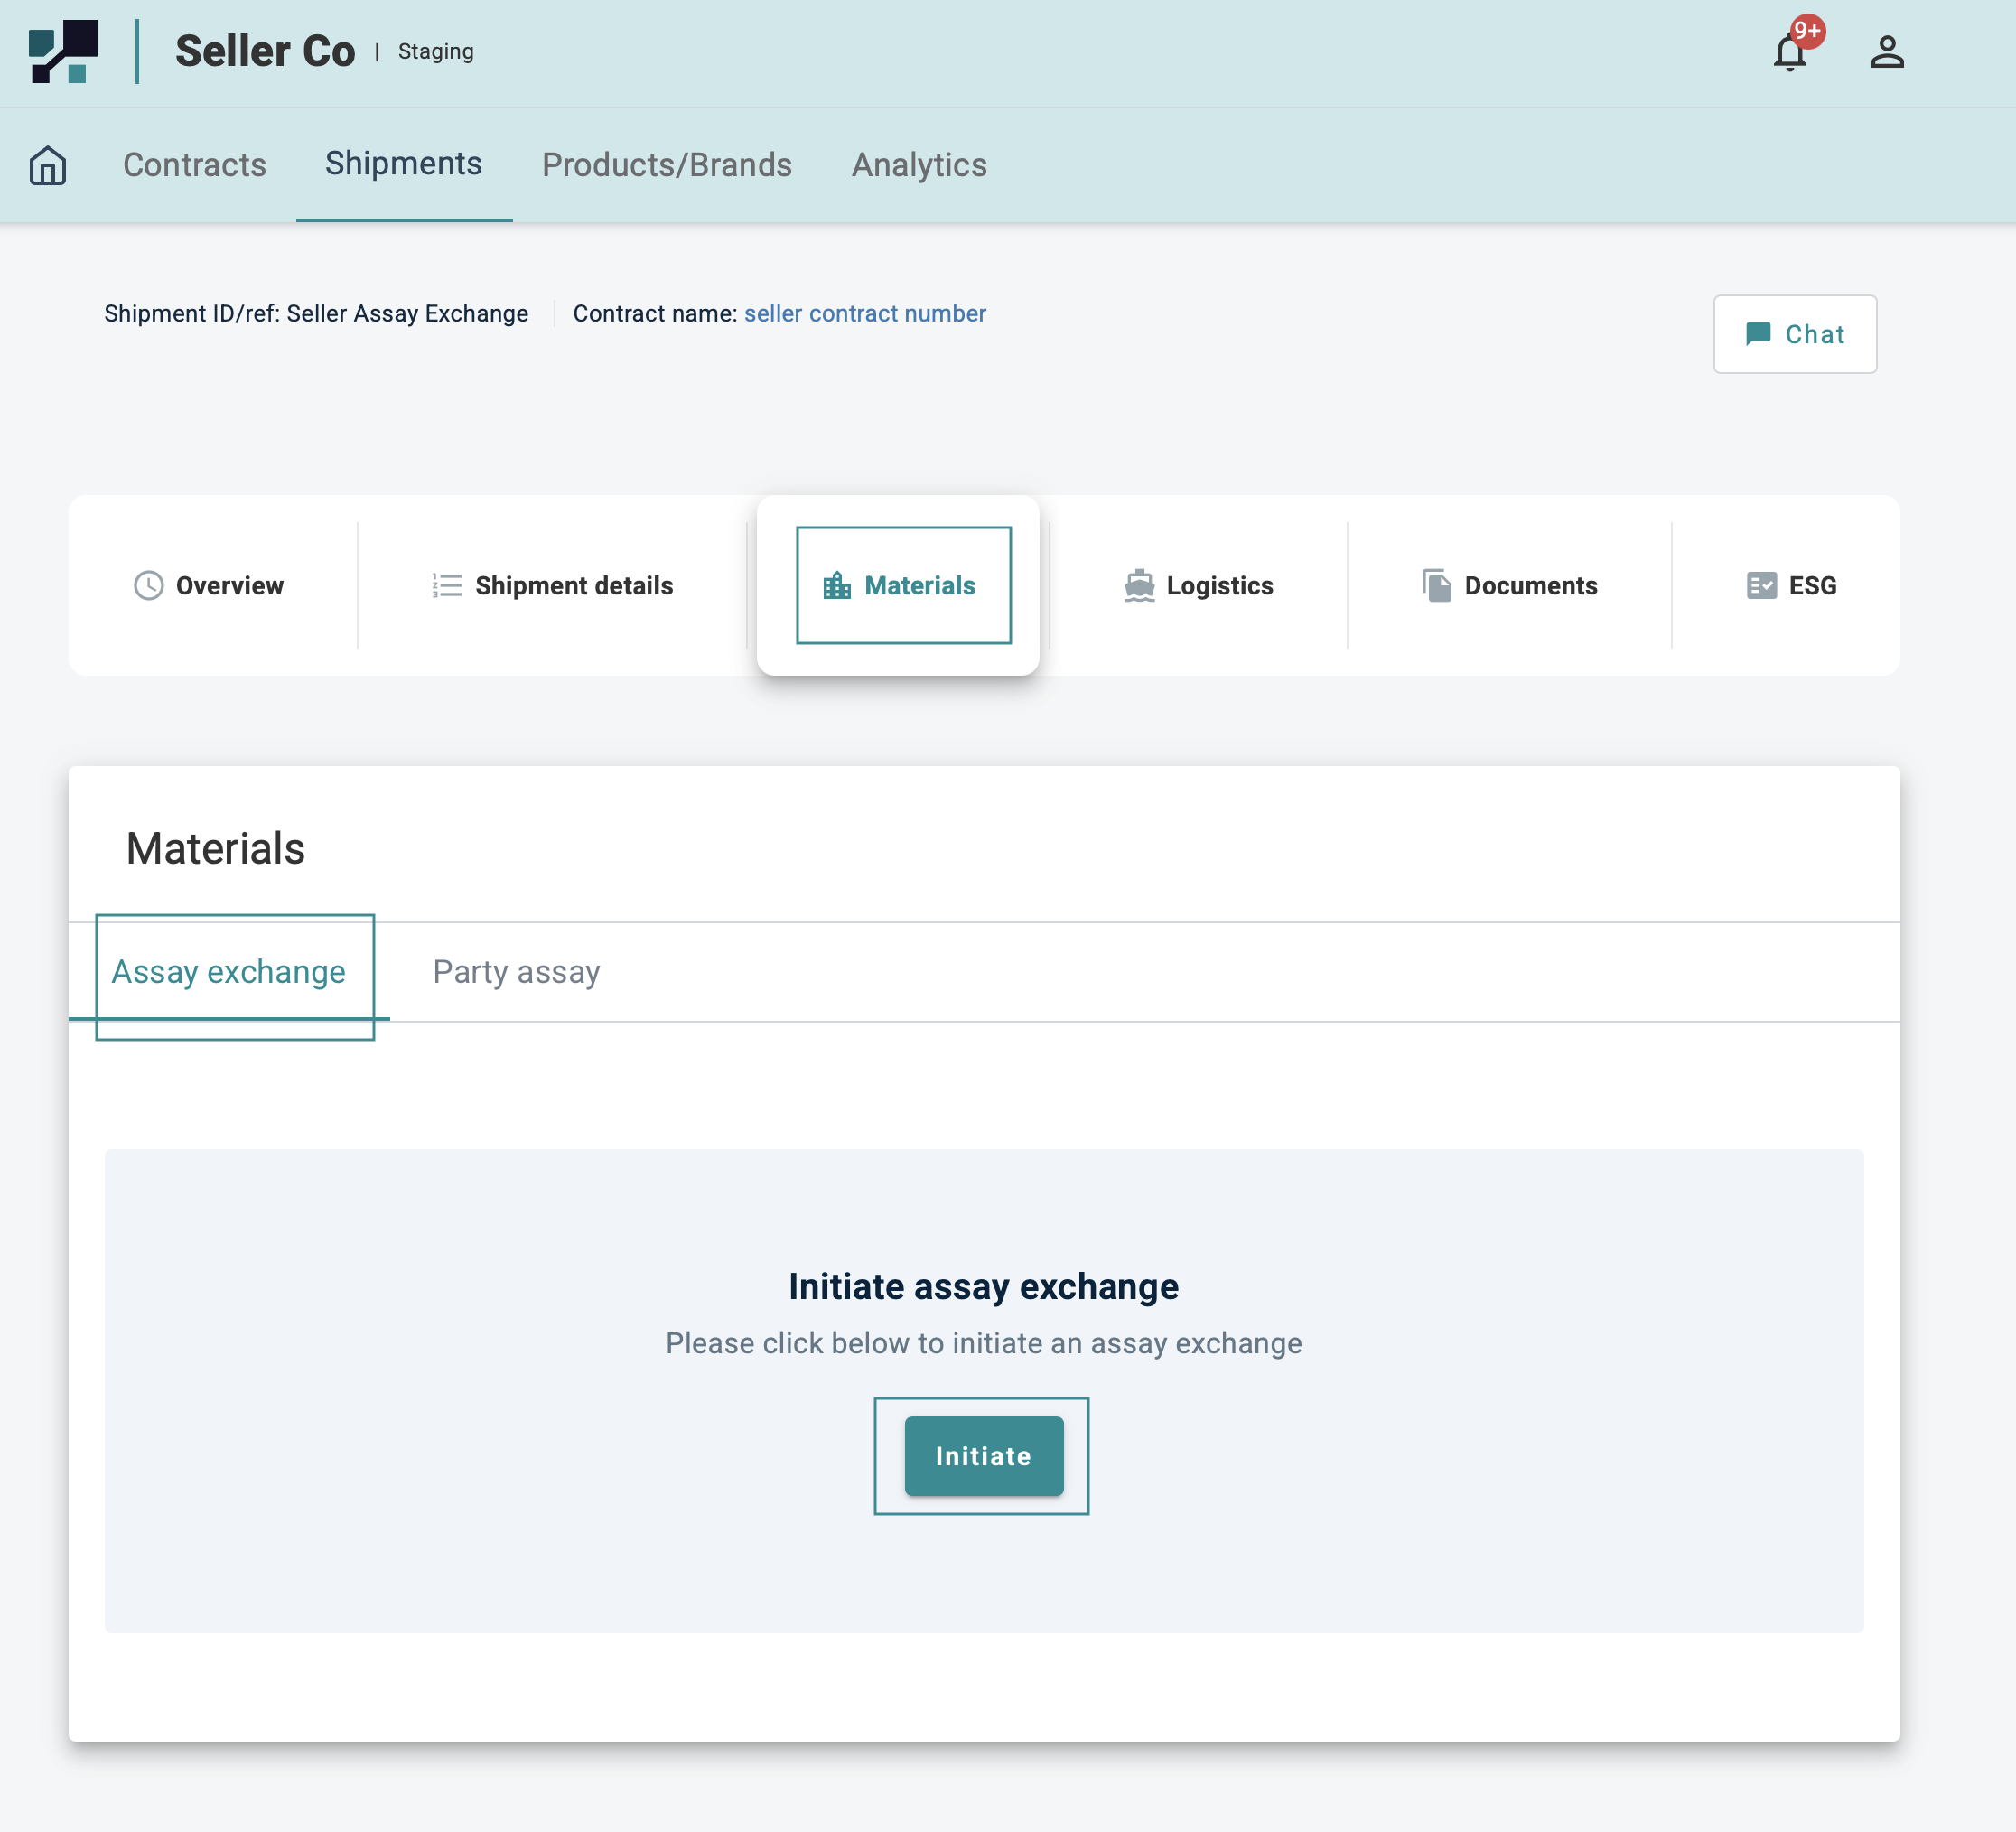
Initiating Assay Exchange
- Under the relevant Shipment's Materials tab
- Choose Assay Exchange and click on Initiate
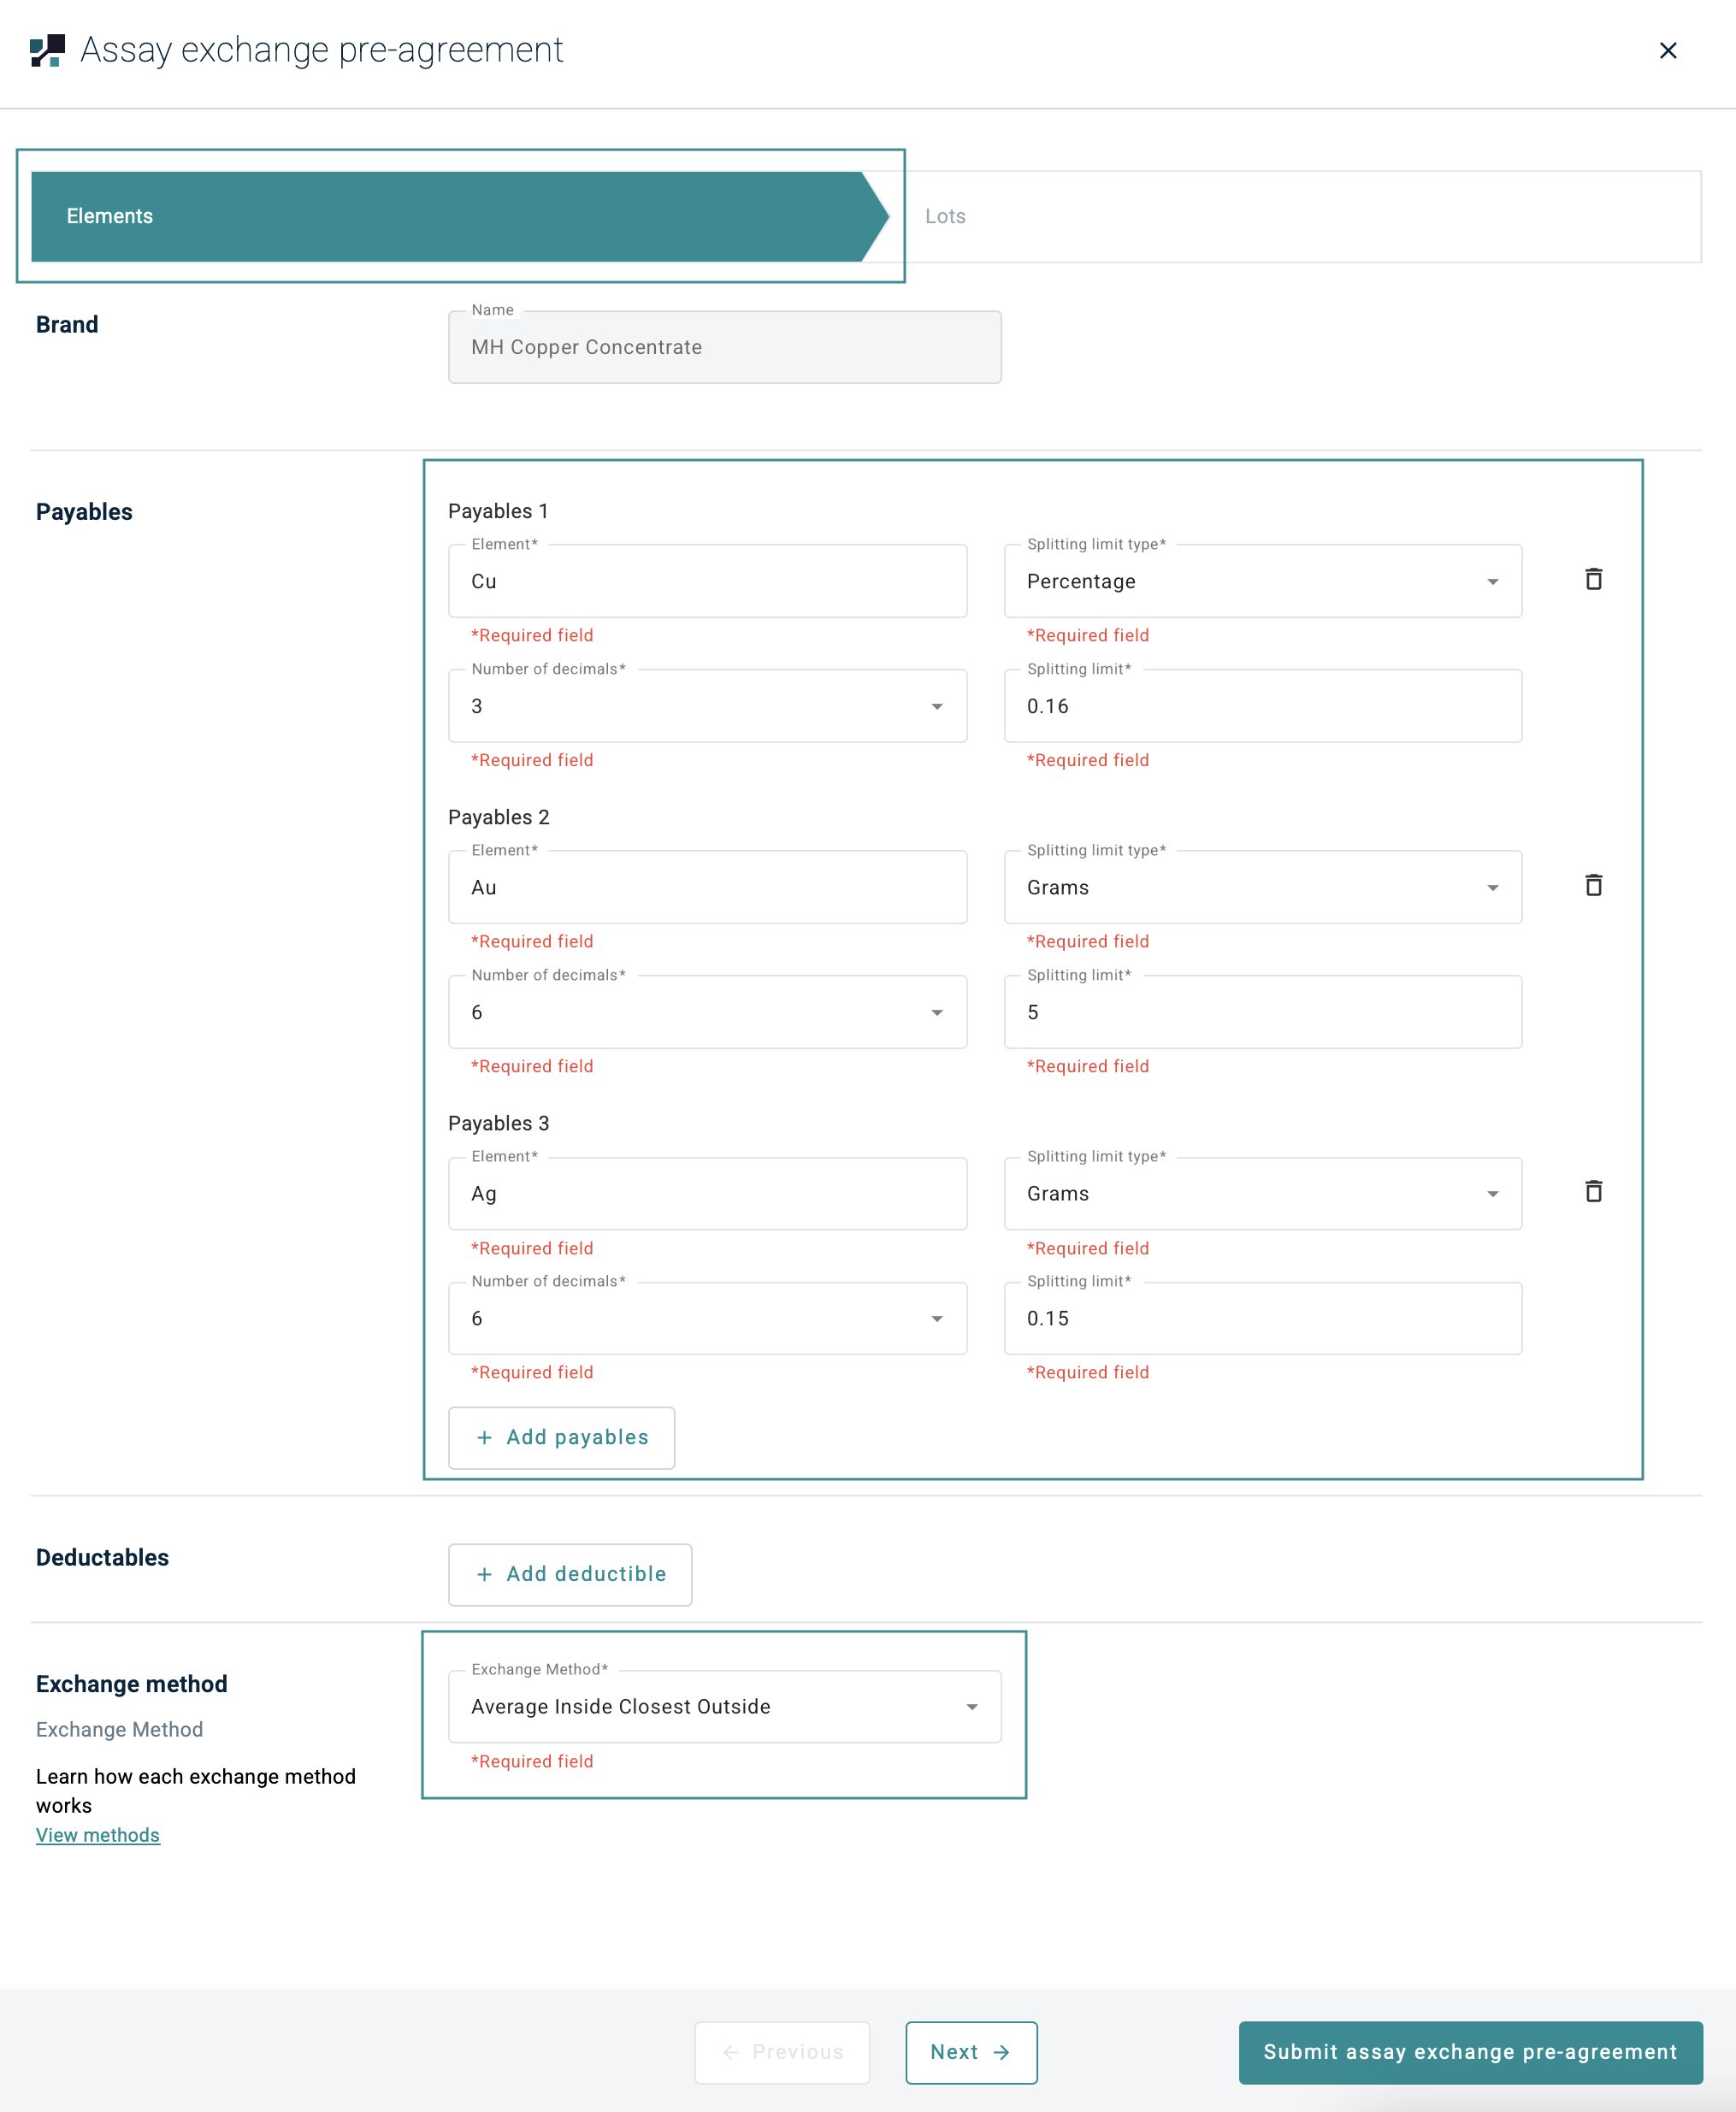
Assay Exchange pre-agreement
A model will open with a series of fields to fill in for ASSAY EXCHANGE PRE-AGREEMENT
Elements
Payables
- Key in all the Required Field (mandatory)
- +Add payable if required
Deductables
- Click on + Add deductible (not mandatory)
Exchange Method
- Select the relavent Exchange Method from the dropdown list.
- Click on View methods to learn how each exchange method works
For more details on Exchange Method, check out - Exchange Method user guide.
Lots
Number of lots
- Key in the number of lots Required Field
And choose to check lots by ticking either
- Check lots by file upload : Drag&Drop or Upload
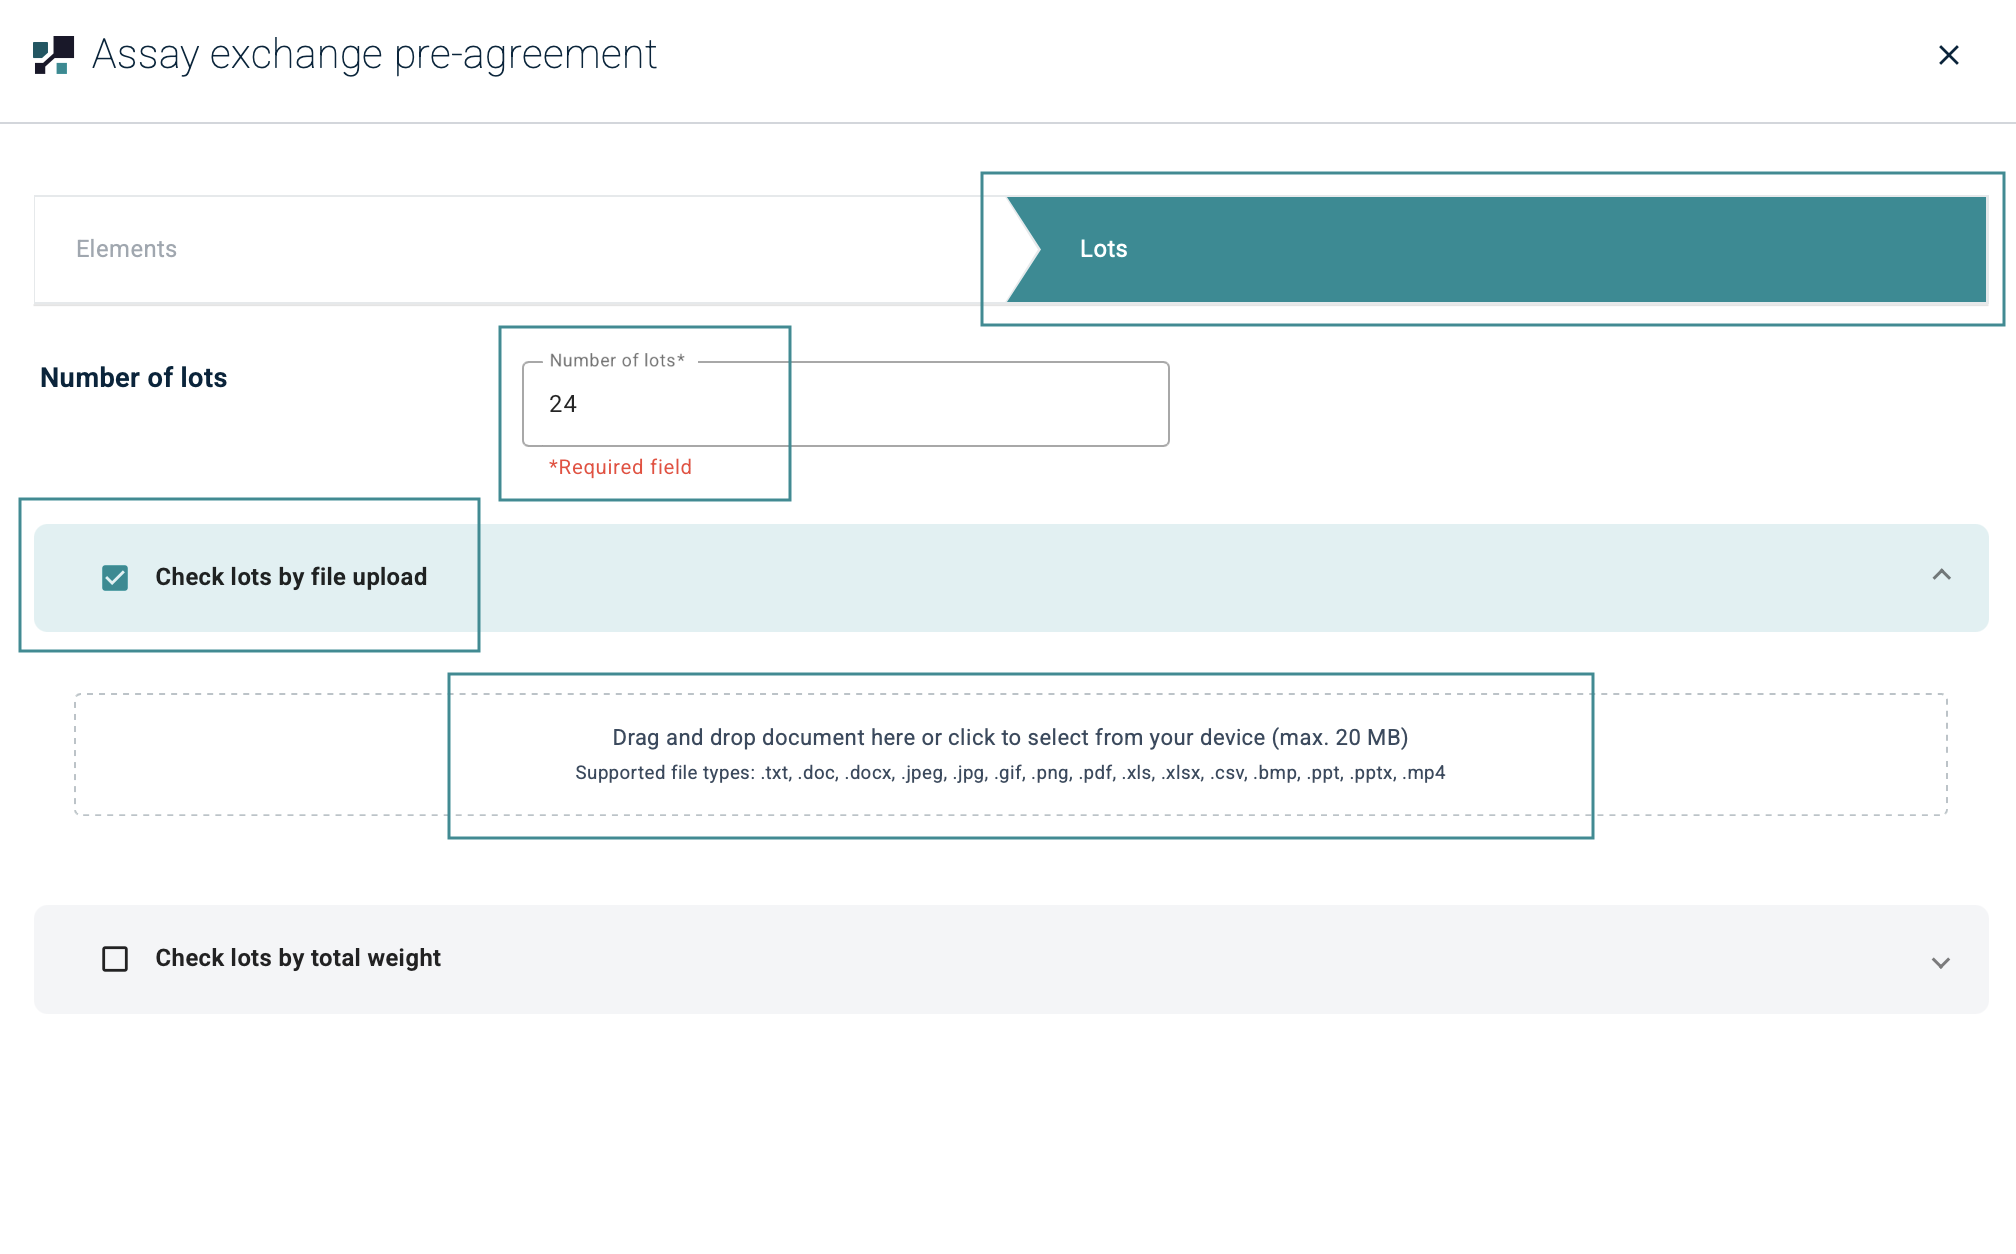
or
- Check lots by total weight: Key in the Lots by total weight
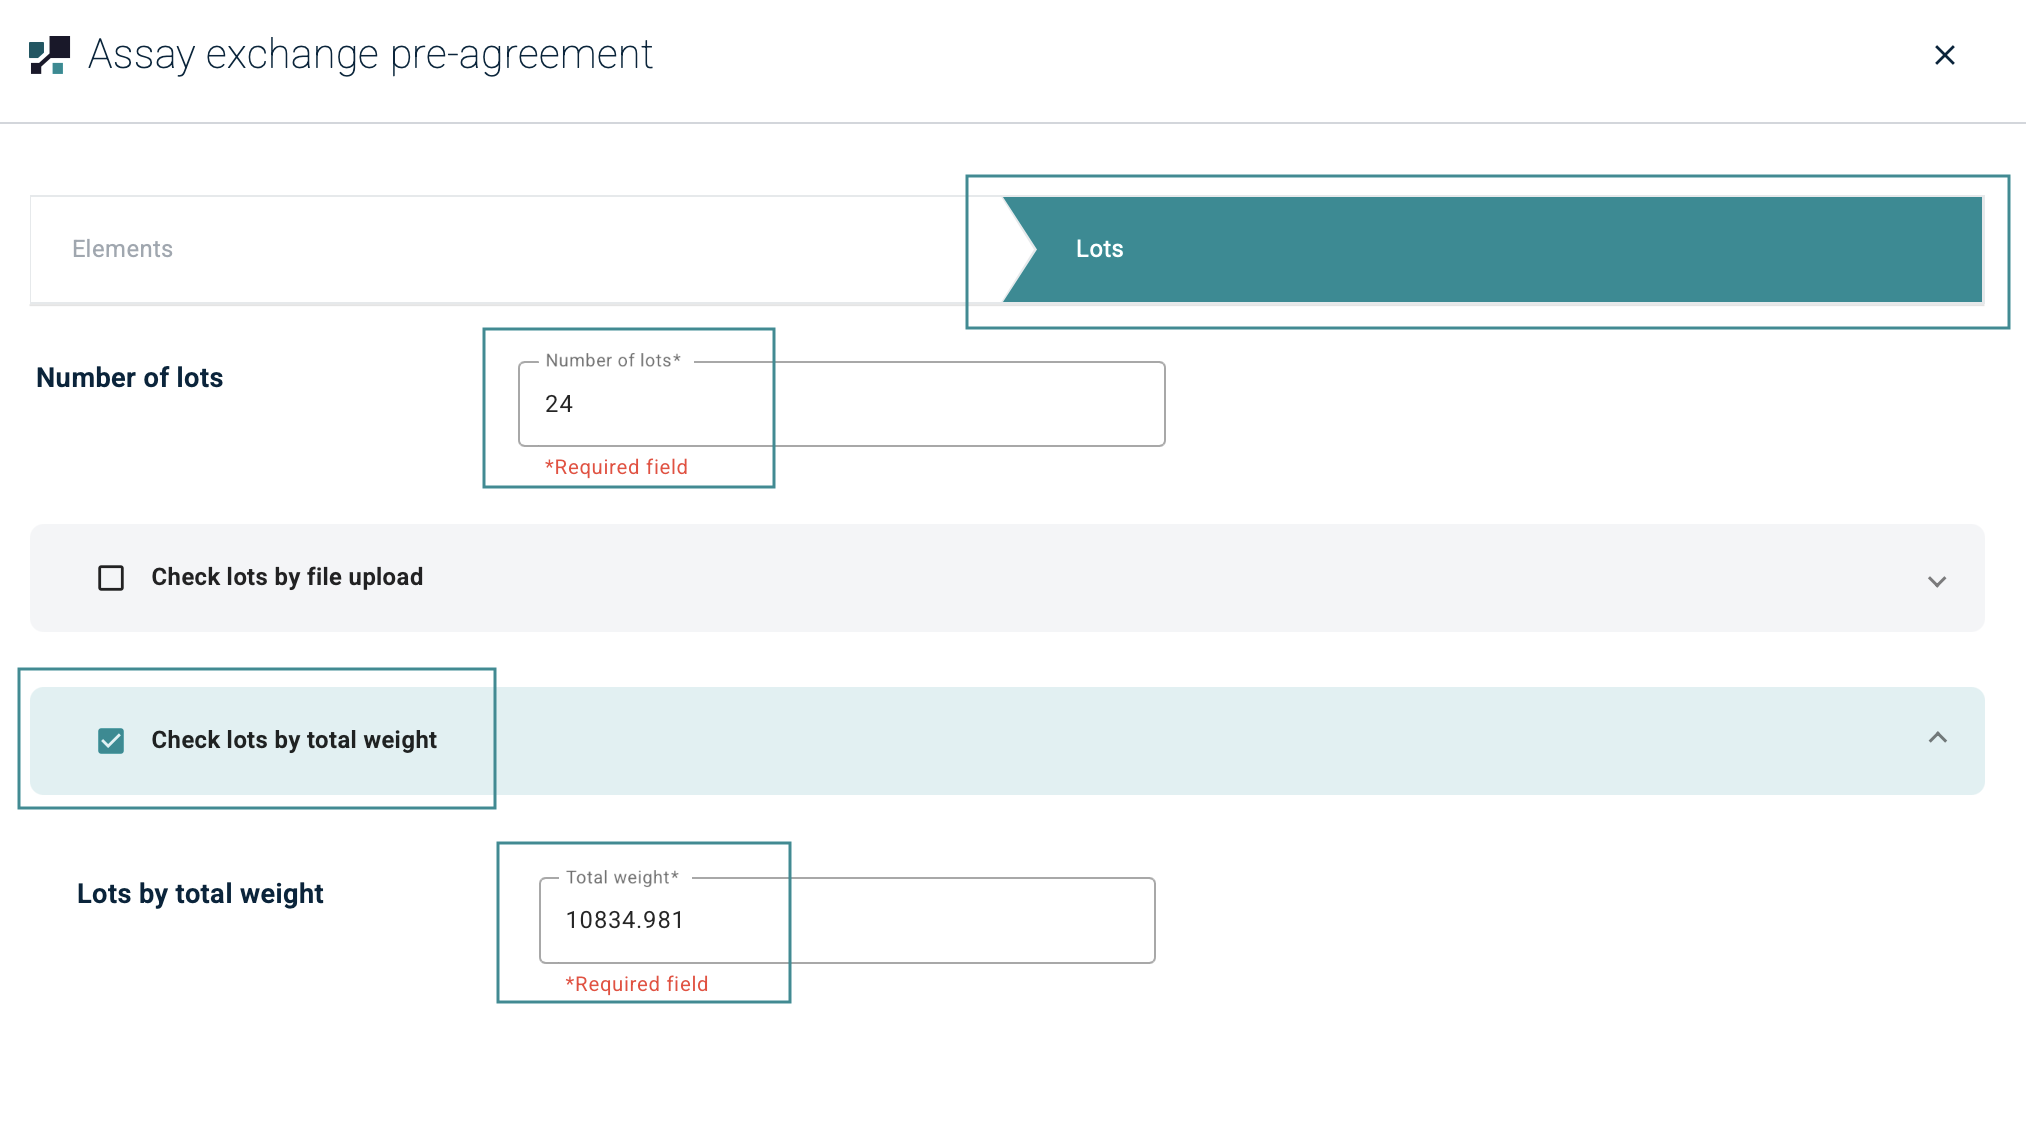
Once done, hit Submit assay exchange pre-agreement

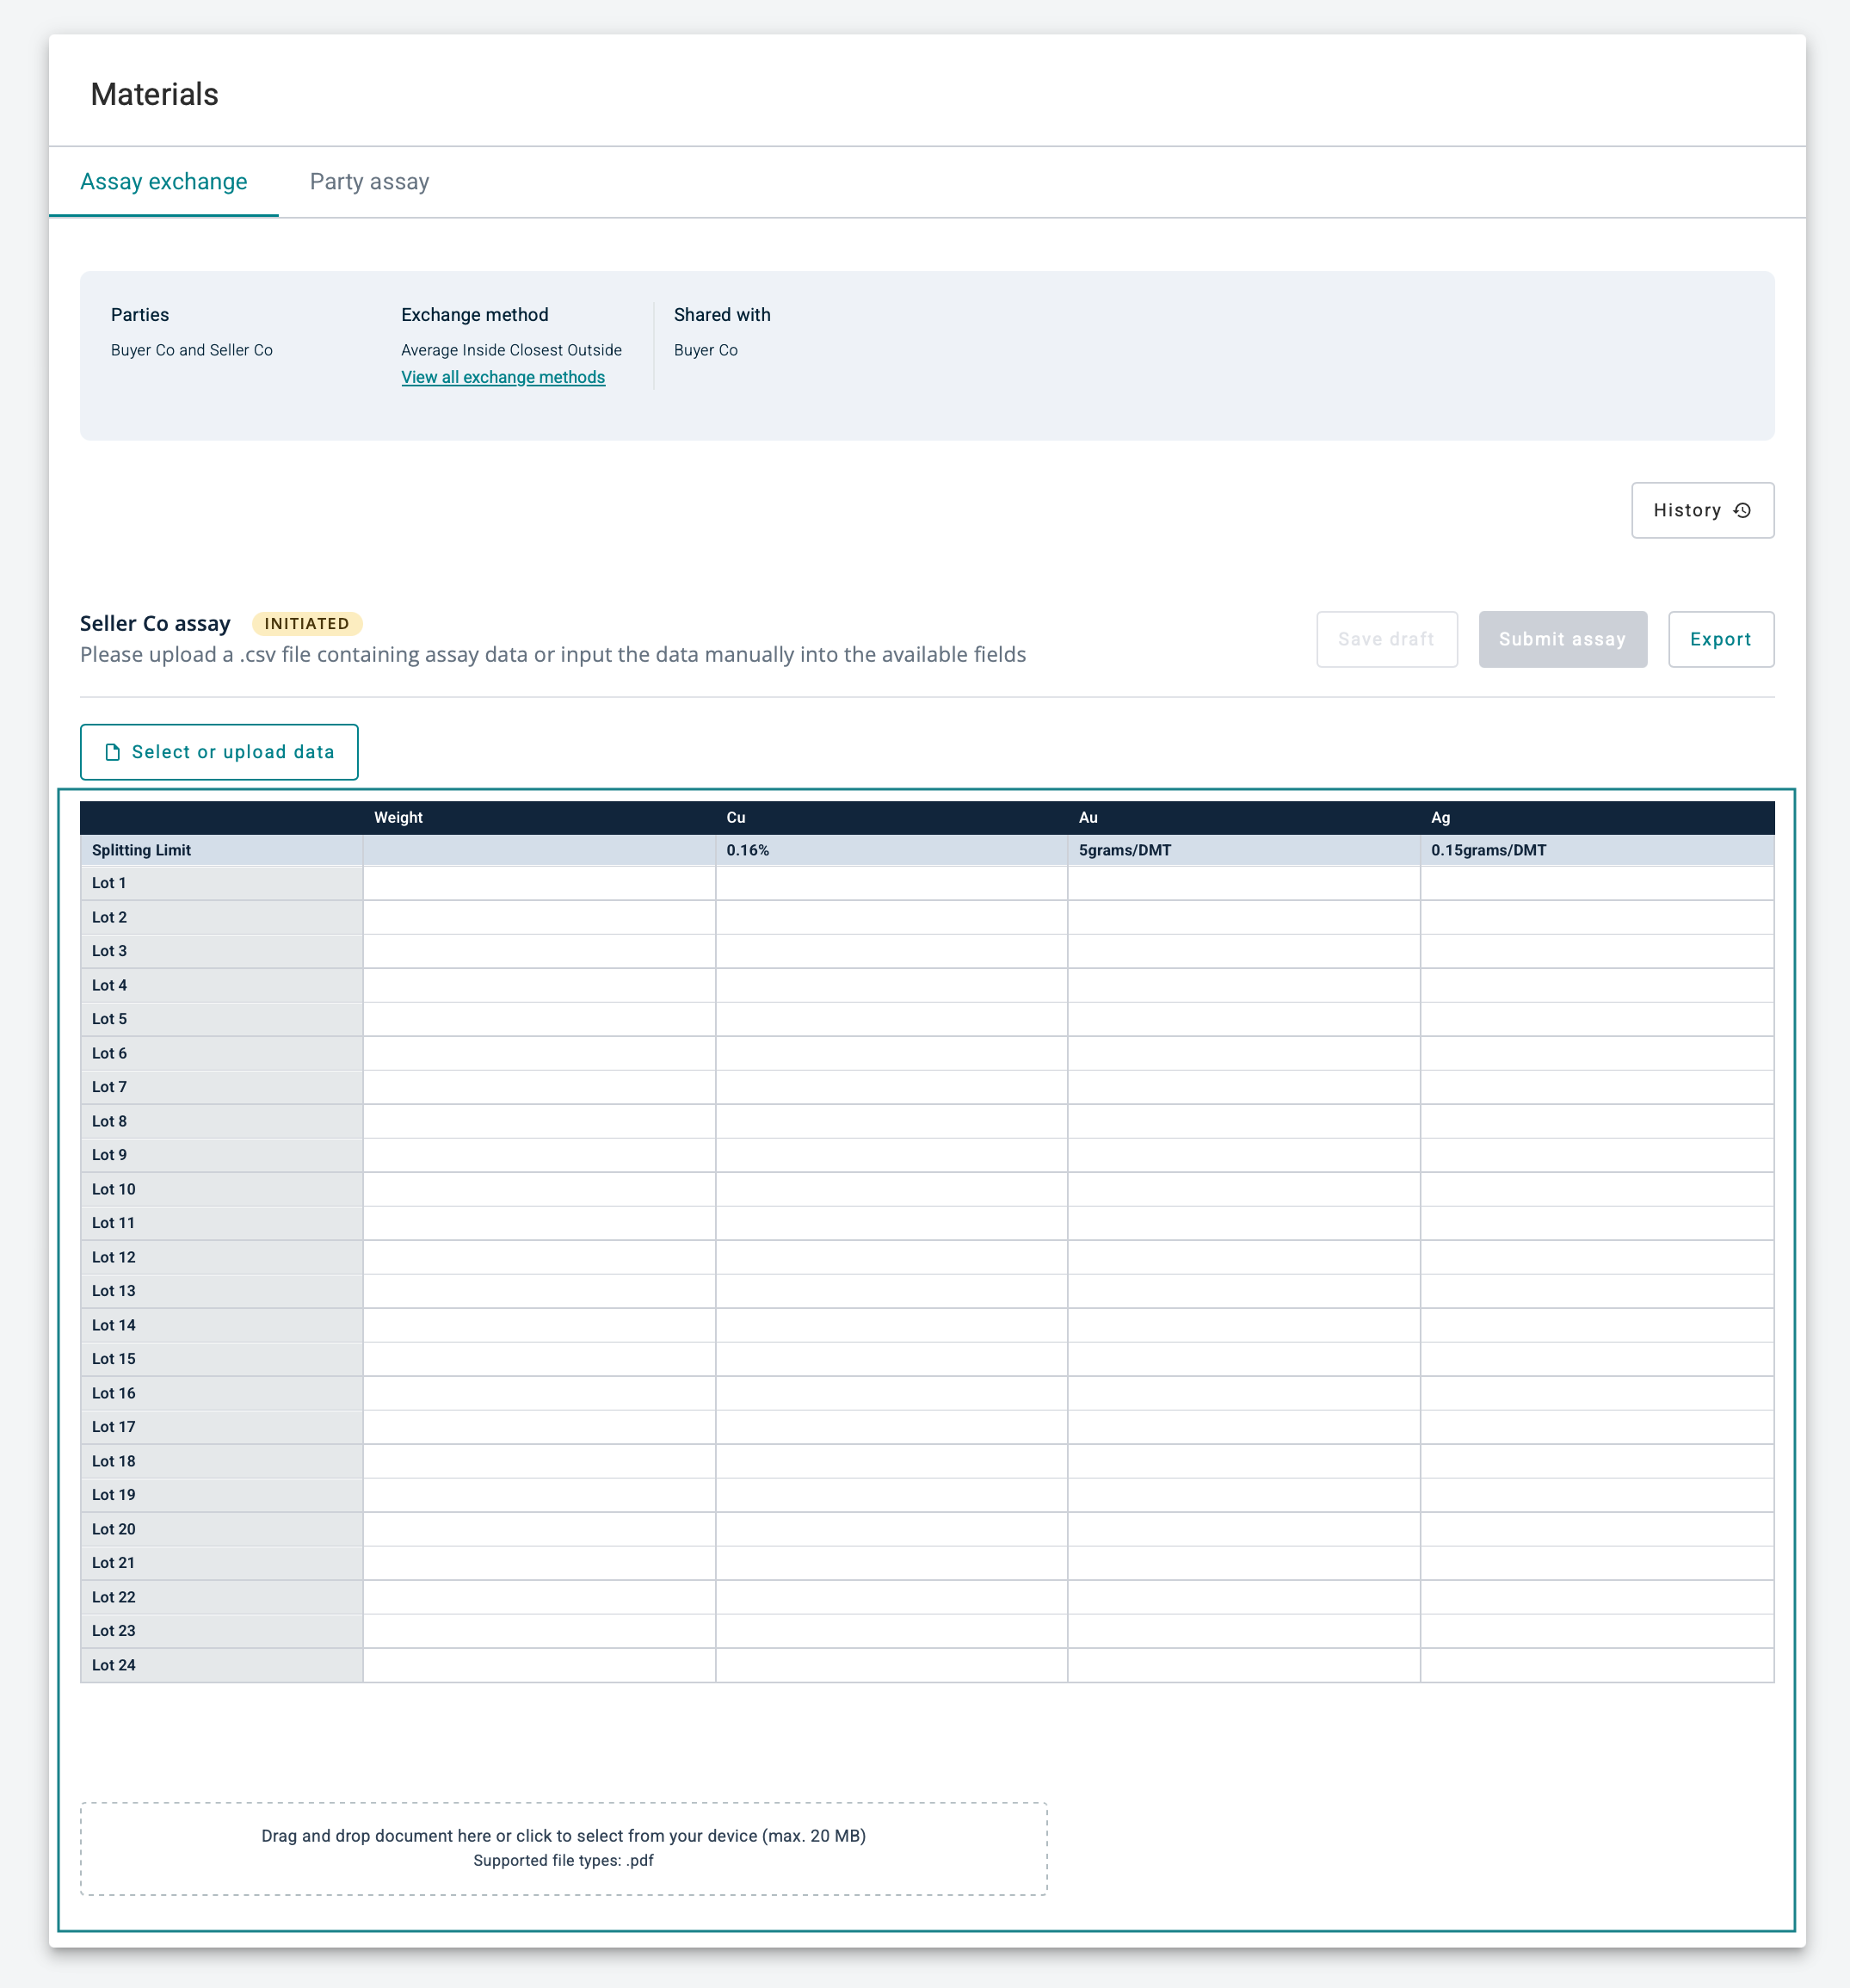
Now the Assay exchange pre-agreement status has changed to PRE-AGREEMENT ACCEPTANCE REQUIRED
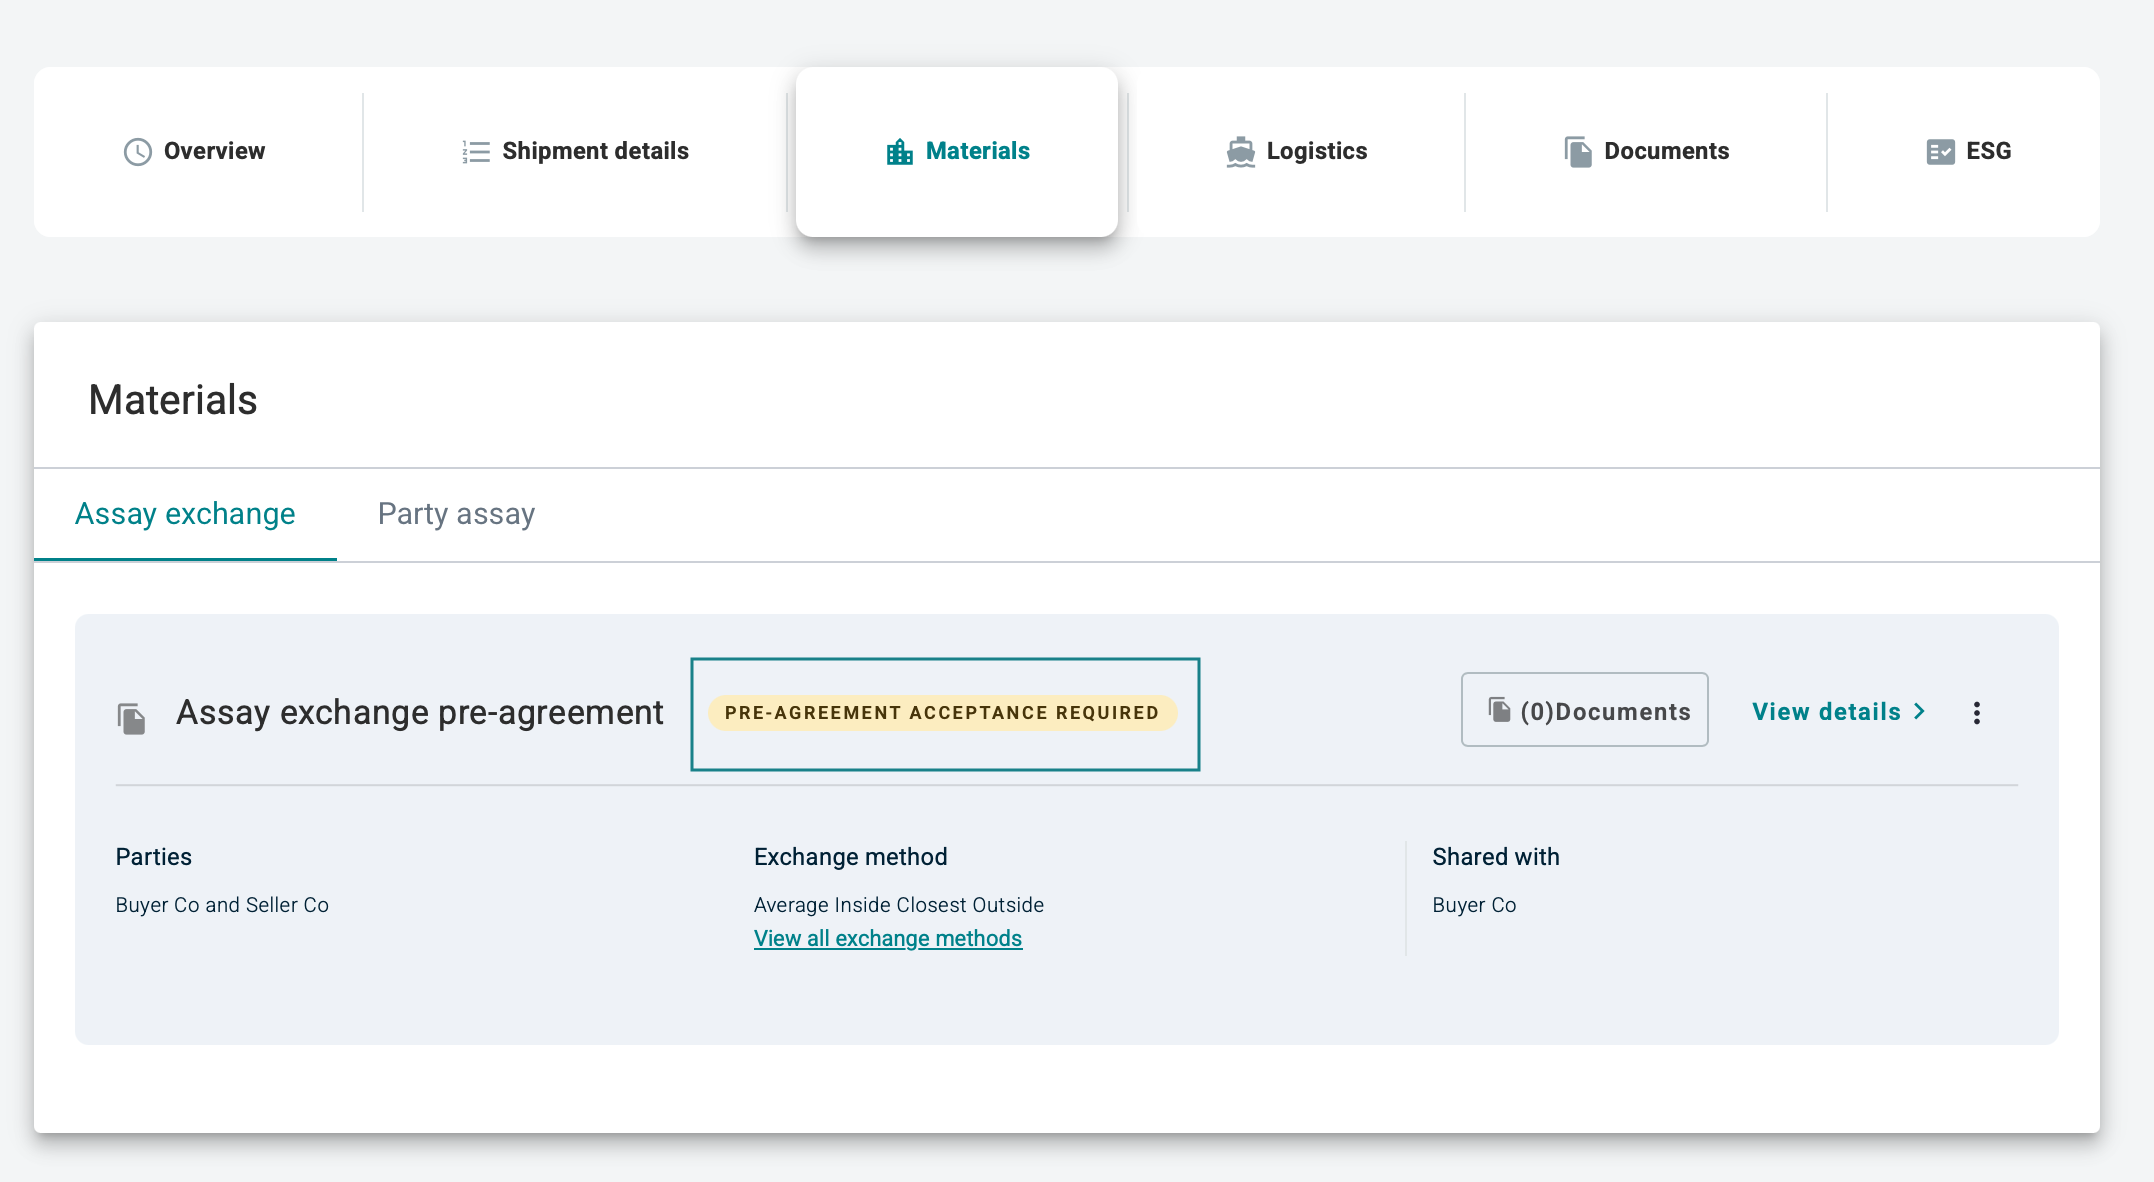
Counterparty will need to view details and either
- Amend assay exchange pre-agreement (if anything is amended, the other counterparty needs to review and )
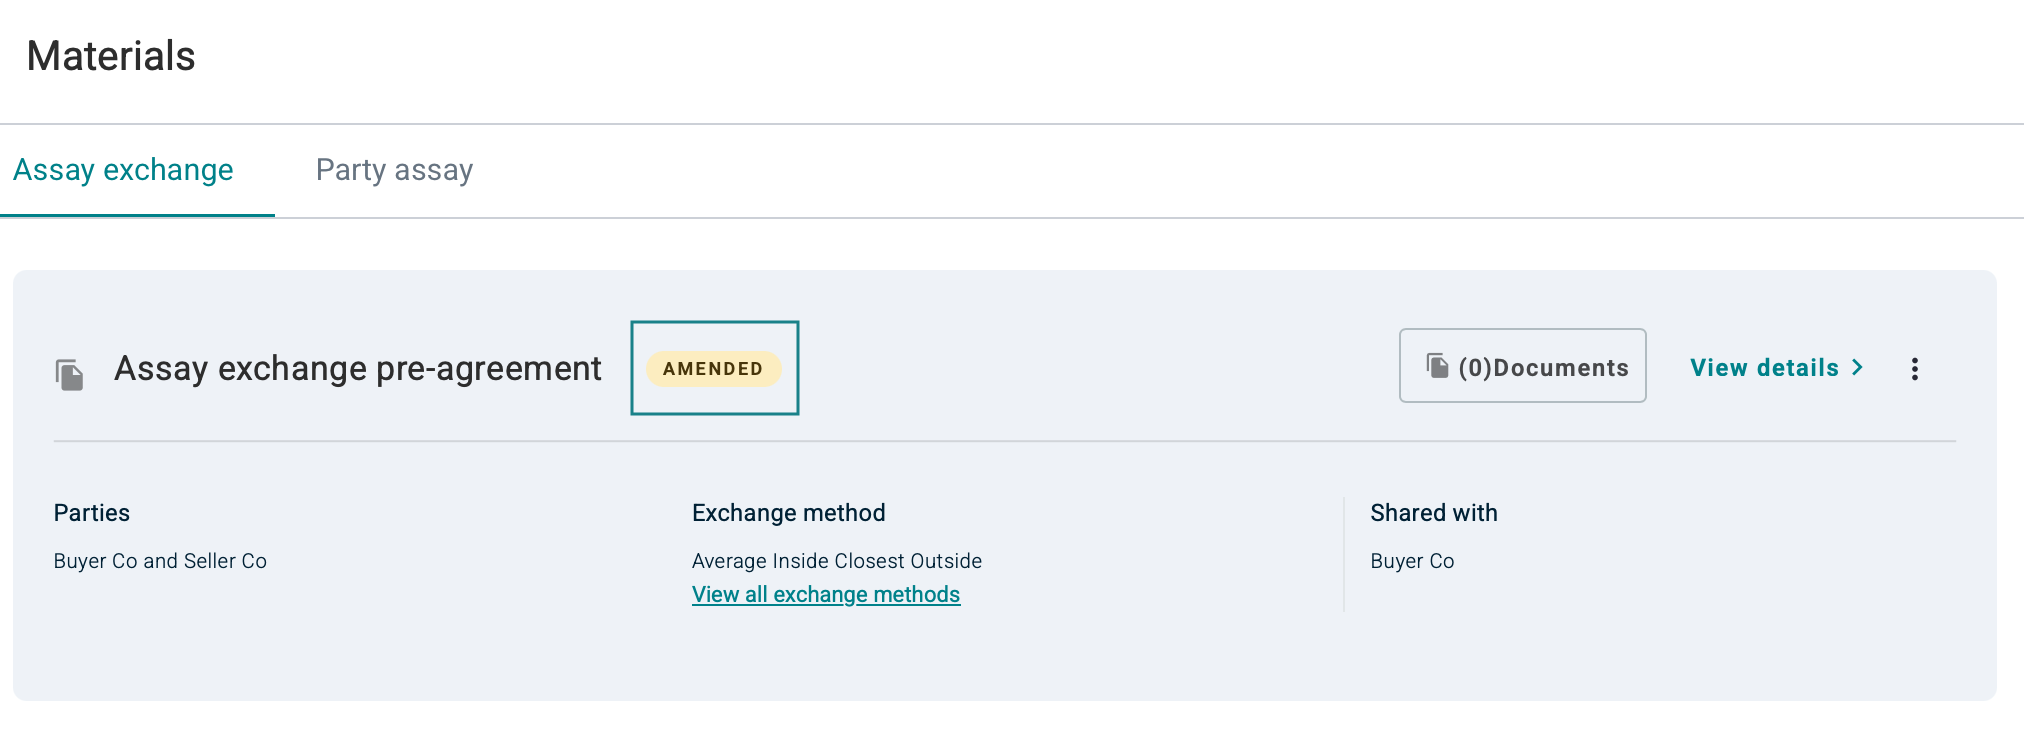
If anything was amended and requires confirmation by the counterparty, Assay exchange pre-agreement status has changed to AMENDED
- Confirm assay exchange pre-agreement (if everything is reviewed and confirm)
After confirm, Assay Exchange table will be generated automatically based on the Contract / Shipment details